Heal

Heal - Artwork by Angela Porter at Artwyrd.com
Heal – Artwork by Angela Porter at Artwyrd.com

About the art.

I don’t know who said these words, but they resonated with me when I stumbled upon them. Not only did they resonate, but they also brought tears to my eyes and my heart too. I have words for one of my goals for recovery from cPTSD. This is why I had to do something with the quote in my own inimitable style.

So, I took the words and chose a pretty font for them, arranged them as I wished and then printed them out onto acid-free paper. I trimmed the paper to approx 21cm x 21cm and added some pencil guidelines for space around the quote and the edge of the paper.

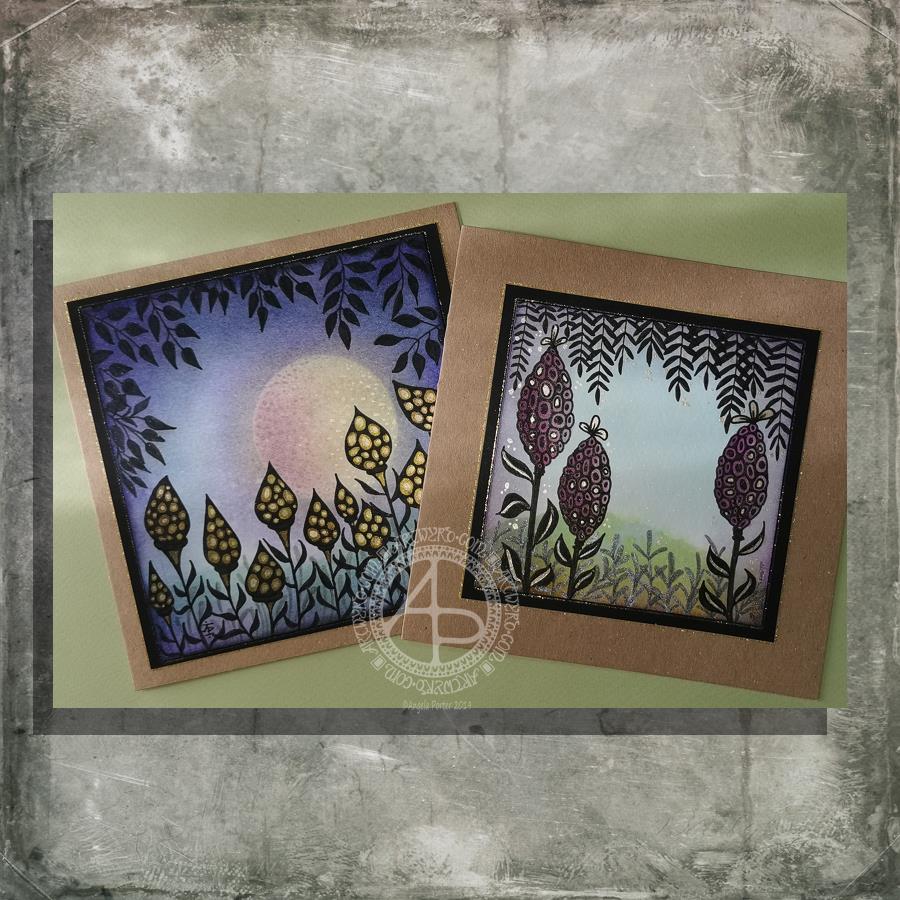
Next, I used Tombow Fudenosuke and Faber-Castell Pitt Artist Pens to draw a design. I stuck to just a few motifs that I repeated to fill the space. I also let the design elements to spill over the pencil margins here and there to give a more organic feel to the artwork.

Finally, after erasing the pencil lines, I scanned the drawing in, increased the contrast a little to remove most of the remaining pencil marks. I then added a grungy, colourful, autumnal background.

I’m pleased with this one. I really like the way the Fudenosuke pens work for me now. I love the variation of line and the bolder line that I have used. I also think that using just a few design elements and repeating them to fill the space results in a more cohesive design.

I think I could have left a bit more space around the quote; however, it is good enough.

So, Angela, how are you feeling today?

And for me to say something is good enough is a sign that I am recovering from a bad day yesterday. I’m still somewhat emotionally fragile and vulnerable, but I’m able to see that my art is good enough.

Yesterday, nothing I did was good enough. I lost faith in my crochet, my digital art, my drawing. Nothing seemed to work out, and I really was doubting my abilities.

EMDR therapy for my cPTSD was rather distressing and left me exhausted. Mind you, I was exhausted to begin with. Monday I wore my protective mask as I had to go somewhere where I’d be with people I didn’t know, doing something I was really anxious about, and I didn’t know the place I was going to. I was exhausted after keeping my mask on for just four or so hours.

How on earth did I find the energy to keep the mask up for all those years? 

One good thing has come from this experience – I can see how exhausting it is to keep up a mask for even a short time. I wonder how on earth I managed it for most of my life!

Anyway, after EMDR, I was more exhausted and came home and slept. In the evening, I thought I needed to be creative. It all led to me being hard and overly critical of myself. Little comments made to me just made it worse, even though the comments weren’t negative, my emotionally vulnerable and exhausted state twisted them that way.

Even though I was emotionally vulnerable and caught up in a storm of thoughts and feelings, I was still aware of this contentedness inside me, but I just couldn’t anchor myself fully to it. I was a little bit adrift in the turbulent waters of my emotions and thoughts.

I should know by now that I need to choose what activities I do carefully at times like this. Last night, I didn’t do that. However, I eventually got back to sleep, and I woke this morning feeling more content.

There’s not quite the sunshine within present today; there are still some emotional clouds covering it up. However, I know that they will not persist and will move along as I practice self-soothing and self-care and do creative activities that won’t push me too much and won’t engage the inner critics.

I’m still drained, physically, mentally and emotionally, but I am in a better place today. I think my drawing above shows that too.

Crochet Seed Pods

Crochet Seed pods by Angela Porter – Artwyrd.com

I really do wish I could take better photos! However, I think you get the idea of this pair of pods that I created last night and in the early hours on waking.

These ones I’m really pleased with; they’re the ones that look most like the seed pods I draw. I’ve also progressed to adding leaves to the stems and that funny star-shape.

I’m going to spend the evening doing some more crochet. I had EMDR therapy this morning, and it has totally drained me. I was tired and emotionally fragile, to begin with; I’m now emotionally exhausted and need to take self-care time.

I know that if I were to attempt digital or traditional art/drawing, then I would not feel satisfied with what I do. I’d get frustrated with myself, I’d become overly self-critical and would end up feeling worse than I do now. Although I am emotionally exhausted, I feel calm and fairly content. I need to keep activities that would drag me down to a minimum until I am more emotionally resilient.

So, self-care it really does have to be this evening, and maybe some or all of tomorrow.

Autumn Equinox 2019

Crochet Seed Pods by Artwyrd.com
Crochet seed pods by Artwyrd.com

It’s the first day of astronomical Autumn in the Northern Hemisphere – Spring for those of you in the Southern Hemisphere.

The signs of autumn are all around me. leaves are starting to don their fiery autumn hues. Shiny-red rowan and hawthorn berries festoon the branches. Shiny purple-black bramble-fruits mask the sharp thorns on their canes. Nuts of all kinds are changing from green to brown – a veritable feast for all kinds of critters. Bunches of sycamore helicopters and ash keys can be seen peeking out from the dark-green-tinged-with-brown leaves. Fluffy seed-heads of clematis coat the hedgerows like some kind of Hallowe’en web-like decoration.

It is my favourite season of the year. I love the colours. I am fascinated with how nature reveals it’s underlying architecture as the foliage falls, creating piles of colourful, crunch leaves that remind me of glowing embers.

Nature really does prepare for the long winter sleep by donning her party clothes for a final blaze of glory , a memory that will stay with us throughout the cold, dark Winter months to remind us that she merely slumbers and will reawaken in the Spring.

So, given my current fascination with freeform crochet, I have created some seed pods; at least that’s what I had in mind as I created these forms.

I do want to add some beads to them; I can’t resist adding some sparkle!

Of course, seed pods are quite apt for the season the world is entering; they are in abundance. I do love seed pods; they feature in my artwork quite a lot. So, it’s quite natural that I’d want to try to recreate some of my weirder ones in crochet.

This kind of crochet is turning out to be a bit easier to do than I thought it would. I do have a lot to explore and discover and a lot more confidence to gain, but I think I’m making a good start. I do need to learn some more textural stitches as well how to create spirals just to start.

To give you an idea of size, the largest seedpod is approx. 12″ in length. I used a 3.50mm hook with DK yarn. I will make some more pods in four-ply yarn with finer hooks. They should work out smaller.

I suspect that on my travels I may come across some interesting yarns with various textures and finishes that I can use to add some interest. However, for now I will just focus on how I can achieve the shapes and curves that I’d like to form seedpods.

Don’t tell me it’s all about maths – I’m absolutely a nightmare at maths. I have to figure it all out my way.

Now, if anyone should ever like to create seed pods or anything else I create, I will try to work out a written pattern. But just not yet. I’m still working this all out myself!

Lost in crochet.

Today was not the day to focus on commissions it seems. I managed to lose myself in crochet for much of the day.

Here are some of the results of my crochet experiments. There are three seed pods/vessels and one leaf.

I have plans for them … I think I may turn them, along with many others, into some kind of wall hanging. I need to find myself a branch or some kind of thing.

This is an interesting journey. The seedpods have used things I’ve learned from hyperbolic crochet along with popcorn stitches.

The vessel on the top left actually reminds me of prehistoric pots – something I’ll have to revisit in the future as I do love prehistoric pottery and if I can re-create their shapes in crochet…well it’ll be fun! The base of this vessel is quite rounded.

I have a lot to explore, experiment with and gain some confidence with as far as hyperbolic and freeform crochet goes. However, it’s reignited my interest in it. How long that will last, I don’t know. Quickly becoming bored with things is a symptom of childhood trauma/cPTSD. However, this kind of crochet has a lot of potential for creativity and growth, just as long as I can overcome all my self-doubts and self-hypercritical nature.

Seedpod Landscapes – Art and Card Making

I had a lovely time this morning making the card on the left. Before I started drawing, I added a moon or planet to the background. It really adds something to the card, I think. Something like this is needed on the card to the right I think. However, as I’ve assembled the card it’s not going to be easy to alter!

How I made the cards.

I used Distress Inks and a mini-foam blending tool to colour the backgrounds. I used a circle of paper as a mask for the moon/planet in the left-hand card. To create the land, I used a torn piece of paper to mask off part of the card.

Once I was pleased with the backgrounds, I sprayed the image with a mixture of Perfect Pearls and water and let it dry.

The next step was to draw the designs. I used black and grey Pitt Artist Pens by Faber Castell.

Metallic/iridescent highlights were added; I used Cosmic Shimmer watercolour paints and a fine brush.

The final steps were to adhere the top layer to a black mat, and then this to the card base. Finally, I edged the mat and the top layer with a gold glitter Uniball Signo gel pen.

I have made coordinating envelopes for each card.

My thoughts on the cards.

I think you can tell that the card on the left is the second made. I can see how I’ve learned from the first card. I do like them both.

I would, if I could, add a moon/planet to the right hand card. It would fill that space rather nicely and give a more magical, mystical, ethereal feel to the landscape.

As to the left hand card, I wish I hadn’t done the pods all in black; they appear a tad ‘flat’. In hindsight, I could have used just black outlines and then filled the pod with a colour gradient before adding the metallic highlights.

I also am glad I didn’t try to add a spine to each leaf as I did on the right hand card. However, a highlight at the top of each leaf, suggesting the moon/planet light is reflecting from them.

Oh the whole, however, I am pleased with these cards. They are a new style of working for me. leaving open space is never easy for me, but I’ve managed it with these cards.

Would you like some happy mail?

I’ve already got some recipients in mind for these cards. However, if you’d like some happy mail then send me a message.

I had a lovely time this morning making the card on the left. Before I started drawing, I added a moon or planet to the background. It really adds something to the card, I think. Something like this is needed on the card to the right, I guess. However, as I’ve assembled the card, it’s not going to be easy to alter!

How I made the cards.

I used Distress Inks and a mini-foam blending tool to colour the backgrounds. I used a circle of paper as a mask for the moon/planet in the left-hand card. To create the land, I used a torn piece of paper to mask off part of the card.

Once I was pleased with the backgrounds, I sprayed the image with a mixture of Perfect Pearls and water and let it dry.

The next step was to draw the designs. I used black and grey Pitt Artist Pens by Faber Castell.

Metallic/iridescent highlights were added; I used Cosmic Shimmer watercolour paints and a fine brush.

The final steps were to adhere the top layer to a black mat and then this to the card base. Finally, I edged the mat and the top layer with a gold glitter Uniball Signo gel pen.

I have made coordinating envelopes for each card.

My thoughts on the cards.

I think you can tell that the card on the left is the second made. I can see how I’ve learned from the first card. I do like both cards, though.

I would, if I could, add a moon/planet to the right-hand card. It would fill that space rather nicely and give a more magical, mystical, ethereal feel to the landscape.

As to the left-hand card, I wish I hadn’t done the pods all in black; they appear a tad ‘flat’. In hindsight, I could have used just black outlines and then filled the pod with a colour gradient before adding the metallic highlights.

I also am glad I didn’t try to add a spine to each leaf as I did on the right-hand card. However, a highlight at the top of each leaf, suggesting the moon/planet light is reflecting from them.

Oh the whole, however, I am pleased with these cards. They are a new style of working for me. Leaving open space is never easy for me, but I’ve managed it with these cards.

Would you like some happy mail?

I’ve already got some recipients in mind for these cards. However, if you’d like some happy mail then send me a message.

I’ve already got some recipients in mind for these cards. However, if you’d like some happy mail then send me a message.

More mail art

More Mail Art © Angela Porter | Artwyrd.com

After a very late night talking to a friend and not enough sleep, today is a self-care day. I’m going to go back to bed soon and try to sleep some more before driving for four hours tonight.

While waiting for sleep to catch up with me again, I thought I’d make some mail art. The photo isn’t the best; I’ve said it before, I’m not a brilliant photographer. However, I’m sure you get the idea. Also, I wanted to catch a glimpse of the metallic highlights I’ve added to this card, so the angle of the photography was just plain weird!

My brain seemed to have ticked over some ideas while I was asleep and I woke with some things I thought I could try out. This card is the result of some of them.

I started by using a 4″ x 4″ piece of watercolour paper and applying Distress inks to it to create a background.

I used a torn piece of paper to mask off the bottom of the panel so that could use an ink blending tool to apply Pine Needles and Crushed Olive Distress inks to create some land.

A sky was required, so I used Broken China Distress ink to create it so that it faded from top to the land.

I then sprayed the background with a mixture of gold Perfect Pearls and water to create a less perfect appearance.

While this was drying, I flipped through my Zibladone (visual dictionary) and found some motifs I liked. I used Pitt Artist pens from Faber-Castell to draw the motifs on the panel. I chose these pens because they’re waterproof when dry and I knew I wanted to add colour and sparkle to them later on.

To give a sense of dimension, I used black pens for the foreground motifs and a grey brush pen to create the foliage in the background.

To help the seed pods stand out, I used washes of Dusty Concorde and Seedless Preserves Distress inks. Then, I used some Cosmic Shimmer gold iridescent watercolour paint to add the gold highlights.

Once everything was dry, I used a piece of Cut’n’Dry foam to edge the panel with Dusty Concorde Distress Ink. The design was framed nicely by this edging; it also added a sense of dimensionality.

Next, I mounted the panel on a piece of black card and then adhered these layers to a 6″ x 6″ blank Kraft card, all done with Tombow Mono glue.

Finally, I carefully used a gold glitter Uniball Signo gel pen to add lines around the edge of the design panel and also the black mat.

I then turned my attention to the envelope. I drew some more of the seed pods before adding a light wash of Dusty Concorde and Seedless Preserves Distress Inks, being careful not to overwet the envelope. I added dots of gold watercolour paint to the seed pods and the space around them too, making sure I left enough space to write the name and address of the eventual recipient.

I’m quite pleased with the card. I’ve done this style of drawing digitally in the form of a mandala, but never like this. However, as I look at the card, it seems to need a focal motif in the space between the seedpods. I may be wrong; it may just be my constant need to fill up space with line and pattern and the difficulty I have in leaving white space in a design.

I shall let the card ‘sit’ for a while before making my mind up on that issue.

Entangled Cards and Envelopes

Entangled Cards and Envelopes © Angela Porter | Artwyrd.com

I’ve woken to a grey, wet, fresh day here in the Welsh Valleys. The coolness is actually quite delicious on my skin. The rain is freshening the air and world up, clearing the dust away. What a way for the weather to see out August!

It’s a perfect morning to do some artsy crafty stuff. For me, that meant finishing off a pair of cards with coordinating envelopes.

Making the larger entangled seed pods card.

The top panel measures 3″ x 3.75″, mounted on an A6 card (UK sizes). 

I coloured The envelope, top panel and the border of the middle panel envelope and the edge of the middle panel with Crushed Olive, Forest Moss and Shabby Shutters Distress inks. I used a mini foam blending tool to achieve a gradient. 

I sprayed water onto the top panel. Distress Inks react with water and results in some interesting textural patterns. I didn’t spray water onto the envelope; the paper is too thin to take such treatment.

My next task was to draw the entangled designs; I chose to go with some seed pods, leaves, a geometric pattern and some little flowers too. I added some ‘sparkle’ patterns around the main elements to give the illusion of little things floating in the air.

Next, I added some sparkle and shine with some gold and copper ink. I placed ink inside the sparkles, the seeds inside the larger seed pods and the flowers too.

I used a brush and Distress inks to add some depth of colour to the design on the card. I decided not to do this on the envelope, again because of the quality of the paper.

Once I have someone to send the card to, I will address the envelope and seal it with Distress Micro Glaze so that moisture won’t damage the envelope.

The colour choice on this card is unusual for me, but it’s worked out nicely, particularly with the gold and copper accents.

The tiny floral card.

This card is tiny, measuring just 2.25″ x 3.25″. It’s envelope is a little larger than needed, but the We R Memory Keepers Envelope Punch Board didn’t have measurements on it for a card this size, so I just used the closest available.

The panel on the card measures 1.75″ x 2.375″. It is one of the panels from the Foursquare background frames I messed up while making yesterdays cards.

I used one of my ideas from yesterdays musings on the cards I’d made. I drew a simple design on both the card panel and the envelope front and flap using Uniball Unipin pens and then coloured it with Copic markers. I added some gold glitter dots with a Uniball Signo gel pen.

Once all was dry, I used a Versamark Pen to colour over the flowers, leaves and gold sparkles. Versamark ink is colourless and sticky and is made by Tsukineko; it comes in ink pads but also in double-ended pens – a bullet point at one end and a brush tip at the other. The ink takes a little while to dry. 

I covered the sticky areas with WOW super fine clear embossing powder and used a heat tool from Ranger to melt it, giving the design elements a glossy, protective and slightly raised finish. It also intensifies the colours somewhat, which I rather like.

So, I could now colour the background and envelope with Distress Inks without affecting the colours of the flowers, leaves and gold dots. I used a mini foam blending tool along with Pine Needles, Mowed Lawn, Tumbled Glass and Salty Ocean Distress Inks.

The final task was to glue the card panel to the card blank as well as the envelope flaps.

Again, once I’ve addressed the envelope, I’ll use Distress Micro Glaze to seal the inks and prevent any damage to the artwork while journeying to the recipient.

Reflecting on the cards.

I enjoyed making these cards. I particularly like the simplicity of the small card and the effect of the embossing powder. There’s something about teeny-tiny cards that really pleases me. I think it’s that their size makes them just so darned cute!

The larger card I am also pleased with, particularly in my use of colours that are unusual for me. I’m glad I added colour to the seedpods on the card; it helps them to stand out. I do love the copper and gold ink on this darker background too and how well they stand out.

Making envelopes that coordinate with the card is also something I enjoy doing; hopefully, the recipients see them as something a bit special dropping through their letterbox.

So, what’s on the cards for today?

It’s the last day of August, so I need to get a wiggle on to create a September colouring template for the Angela Porter’s Coloring Book Fans facebook group. I feel the need to include some autumn imagery in this one as we are in the dog days of summer for sure.

Tell me, Angela, how are you feeling today?

I’m tired but feeling quite content and optimistic again. I slept well last night; the weighted blanket really is working wonders for me as far as sleep is concerned. One problem is that I don’t want to get out from under it in the morning, so it must be comforting or soothing me.

I seem to have turned in a magnet for people who have escaped narcissistic abuse of all kinds. It’s nice to be able to help others by giving them space where I will believe their experiences, and I can help them, hopefully, to understand that they are not at fault but are victims.

Synchronicity pointing out to me how much I have learned and understood and healed and am now able to help others, perhaps?

Dangle Design Greeting Cards

Dangle Design Greeting Cards © Angela Porter | Artwyrd.com

Today I have two card designs for you, both featuring dangle designs, but in different ways.

If you like dangle designs and you’d like to give drawing them yourself but need a little help or inspiration, then you may find my book “A Dangle A Day” of interest. In the book, I take you, step by step, through how to draw over 100 dangle designs, along with some ideas of how you could use them. 

Love Ya and With Love Card.

I started by using the Foursquare Backdrop: Portrait die from lawn fawn to cut the frames and panels from a piece of Winsor and Newton Bristol Board. I purchased this die, and the one in the second card, from Seven Hills Crafts here in the UK.

Next, I used Stormy Skies and Broken China Distress Inks to add a subtle colour gradient to the panels.

My idea was to draw four different dangle designs for each small square panel. I also wanted to include some hand-lettering, which I did.

So, I used Unipin pens from Uniball to do the drawings and lettering. I did use pencil outlines for the ribbon banners and lettering to make sure their placement was just right.

I coloured the design elements and charms using Copic markers. As the individual design elements were so small, I just used two colours to achieve shading in the bigger ones.

I also added a drop shadow around the designs using a BV marker that is a greyish-violet. It’s a very subtle drop shadow.

I had to add some sparkle and shine to the card, so I used a clear Spectrum Noir Sparkle brush pen along with a gold glitter Signo gel pen to do this.

To assemble the card, I glued the frame to the card base using Tombow Mono adhesive. Then, I glued the square panels into place.

I managed to get glue onto the front of the card and trying to rub it off while wet just left a dark, dirty smear. I’ve ordered some Tombow Sand erasers to see if they’ll remove the mark. If not, I’ll have to either work out another way to cover it up or just consign the card to the pile of things not to do again!

Black and white floral card.

Again, my first job was to cut out the frame and panels using a die. For this card, I used the Foursquare Backdrop: Landscape die from lawn fawn along with Winsor and Newton Bristol Board. I also decided to use this die in portrait mode.

To draw the design elements, I used Unipin pens from Uniball. I hung dangle designs from the top of each card to fill in some of the space that was there. I wish I’d used a slightly thicker pen than the 01 though. They look almost like an afterthought.

Anyway, once I finished the drawings, I wasn’t sure whether to add colour or not. So, I’ve left the pictures as black and white line art for now.

I used Tombow Mono glue to attach the frame and panels to a 5″x7″ piece of Winsor and Newton Bristol board. I did this as I realised that the dies are made to fit card blanks made from half a sheet of US letter-sized paper folded in half. In the UK, we use A4 sized paper, which is different enough in size to make it awkward to cut the paper to fit the card. I have ordered some 5″ x 7″ card blanks with envelopes, and then I can finish assembling this card. I’m likely to trim the foundation panel down a little and maybe try to carefully add some colour around the edge. Maybe.

It’s at this point I’ll decide whether or not to add colour and to see if I can thicken the lines around the dangles without messing it up. Mind you, if I do mess it up, it’s another experiment I can learn from, hopefully remembering not to do this again.

Things I’ve learned and techniques I want to try.

The lawn fawn dies work great! They come with smaller dies – heart, cloud, small star, large star, sun, small sun and speech bubble – which may be useful in the future. I had made my mind up that I’d limit myself to die sets that are simple in shape to for cutting out panels to draw on and maybe for layering. 

I rolled my eyes at myself when I worked out that dies from an American company would work best with American sized paper for card bases. However, I can work around that now I’ve realised that. I’m comfortable working with inches; most of my craft tools have both inches and centimetres on them. However, the inches are visibly the most dominant measurement system. 

Glue. Me and glue. Not sure how I can avoid smearing in the future. Hopefully, the sand eraser will help to remove my gluey, sticky, dirty-looking mistakes.

I like using Distress Inks for backgrounds. However, the pale colours of markers that I prefer to use are translucent and so combine with the background. I could use other media such as coloured pencils for colouring. Or I could use distress inks or water-based marker pens with a damp brush to add colour. I could also use a damp brush to remove some of the distress inks. In that case, I may have to use watercolour paper instead of Bristol Board.

I could also use a Versamark pen – which contains transparent, sticky ink – to colour over my design elements once coloured and then use clear embossing powder and a heat gun to protect the colours. I could then add the distress inks after heat-setting the embossing powder. The embossing powder would add some dimension and shine to the cards. If I used a sparkle pen or gold gel pen, for example, the embossing would encase it and highlight these embellishments Ieven more, I think. I need to try this idea out!

So, there are lots of possibilities for going forward with this.

So, Angela, how are you feeling today?

I’m feeling the more content and optimistic than I have for the past two or three weeks.

I’m still feeling out of kilter; changes are happening in my perceptions around my emotional/mental wellbeing. I’m also aware of shifts that are happening in other parts of me.

I’m still poop-scared about what is going on in the world. I can’t see that ending anytime soon, however. This, and the rest of the emotional rollercoaster I seem to be on, are still upsetting my digestive system, so I’m not feeling too well much of the time. 

Yesterday, I was so unsettled and scared that I couldn’t settle to do much art, and I became so dissatisfied and frustrated with whatever I did. I couldn’t settle to anything else either – not crochet, reading, nothing. 

As I’ve said, today I do feel better, so I need to turn my attention to trying out Affinity Publisher to create some materials I’ve been commissioned to do (the artwork and inserts for a CD by a band!). I’ll see about setting the templates up first and go from there. I’ve not tried to do this the past couple of days as I know my head and my emotions weren’t in the right place. I’m not sure that they are today; it’s only by doing that I will find out whether they are or not.

Monogram A WIP

Monogram A WIP ©Angela Porter | Artwyrd.com

Easy listening playlist on Spotify, creating art. What a lovely way to spend a Saturday morning!

I’ve been working at this monogram now for several days. It is coming along.

It really feels like a an embroidery sampler where the learning embroiderer would try out different patterns and shapes and still create something beautiful.

For me, the sampler is more about out different ideas as they come to me and increasing my knowledge and understanding of the digital art tools available to me in Autodesk Sketchbook Pro.

Of course being able to draw directly on the screen of my Microsoft Surface Studio with a Surface Pen makes creating digital art a dream for me; it’s like working with pens and pencils and so on on paper. However, I’m able to do things I don’t think I’d ever be able to do with traditional media.

I still love working with pen on paper; I currently have one drawing on the go and I may convert it into a digital artwork when it’s done.

Exploring the realms of digital art has opened doors to me that have expanded my creativity in ways I never could have imaged previously.

Yes, I learn by doing myself rather than following tutorials. My experience of watching tutorials is that I end up more confused than I started.

Don’t get me wrong, the ones I watched were excellent. However, they are by people who really know the software and what everything does, and they speak to people who have some idea of it all.

Besides, I want to do art my way, and these artists tend to show how they do things and that often doesn’t make any sense to me.

I’m grateful they share, and one day I may watch some more, but for now the exploration in my own realms of creativity is what is best for me.

As I look at my sampler monogram, I can see how I’m developing my own digital art voice in terms of techniques and effects that suit my style of rather intricate, abstract art based on patterns, curves, swirls and arches, along with a lot of motifs based on nature.

The plain curves in this monogram are adding some much needed scaffolding or girders to support and separate the patterns. Some of the fancily patterned curves are getting lost in the crazy intricacy of adjoining sections.

There are no individual sections that I really don’t like. However, some combinations of sections don’t seem to gel well, at least not to my eye.

What I do love is the layers of diversity of colour and pattern. Each glance reveals something new, whether it’s the way I’ve played with light and shadow, the way patterns look together, or the way colours I’d not normally put together seem to work together.

However, as this is turning out to be a sampler, then that’s fine. It’s all learning for me, and that’s good.

I’ve noticed I’ve not left any white space in this design, so far. I may do that in the area that is left to complete, just to contrast with the pattern-dense areas done so far.

It is a fascinating journey for me, and while this may not be an artwork that I’d offer for sale at redbubble.com or zippi, it’s something that is worth its weight in gold for me in terms of lessons learned and also gaining some confidence in my style of digital art.

Hello July!

July 2019 Colouring Template for members of the Angela Porter Illustrator's Coloring Book Fans facebook group ©Angela Porter 2019 | Artwyrd.com
July 2019 Colouring Template for members of the Angela Porter Illustrator’s Coloring Book Fans facebook group ©Angela Porter 2019 | Artwyrd.com

Can you believe it? Half of 2019 has passed to history. Time has flown by.

With the start of July I also have an exclusive coloring template available free to members of the Angela Porter’s Coloring Book Fans facebook group.

This is my way of saying thank you to those who follow my work, particularly the colouring books I have created.

If you’d like to download and colour, you need to be a member of the group and agree to follow the T’s & C’s.

I’m looking forward to seeing what members of the group will do with this one! I love to see the different colour schemes and media that they use to bring the drawing to life with the magic of colour.

To create this template, I started with a sketch on square gridded paper. It was a very basic sketch with just outline shapes, lines and so on. I then scanned it into the Surface Studio and completed this drawing using my Surface Pen along with Autodesk Sketchbook Pro.

I had to include some of my favourite design elements – butterflies, stars, flowers, fungi, seed pods, arches and geometric patterns.

It was fun to draw, even the sketch was as I love to use a Koh-i-Noor Magic pencil to do the sketching with, one that has quite different colours in the lead so that I get a fair rainbow of colours.

I’m warming to sketching things out before drawing them in ink (either traditional ink/pens or digital) to give me a skeleton I can put flesh on in terms of details and patterns.

So Angela Porter, how are you feeling today?

I’m feeling contented. My stomach/digestive system is back to normal. All just in time for today’s EMDR session this afternoon.

That’s all I have to say about that today. I’m sure I’ll have more tomorrow post EMDR.