I’ve completed more of this WIP this morning. It’s coming along, but it’s at that point where I’m starting to think, “What the heck was I thinking?” about various sections.
I know from lots of past experience that I often get this feeling as I work on some art, and all I need to do is to trust my instincts and intuition and to carry on working on it. And so I shall. This is the way.
A sunshiny, chill-nip-in-the-air, autumnal morning and starting work on a new entangled art drawing. Not much could be nicer start to the day.
I had a delivery of some new fude brush pens to try out, so this one is being drawn with a Zig Mangaka Flexible pen along with a 02 Unipin pen. I’m drawing on marker paper, so I dug out my cool grey Copic Ciao markers to add some shadow to the image in places.
The nice thing about using marker paper and markers is that the ink stays damp long enough for the blender pen to smooth the edges of the grey inks out a little.
I think I’ve worked on this drawing for around three hours so far, so there’s a lot more to go! I hope I can manage to leave some white space in the design, as well as being mindful of the use of contrast so that different sections feel separate to each other.
I started with the square motifs, which are based on Mayan glyphs, and just let the design flow out intuitively. It never ceases to amaze me how layers and dimension appears. It’s never something that’s planned; it just happens and I sometimes don’t see the effect until someone points it out to me.
No central big motif, such as a moth, with this one. Just pure entangled art.
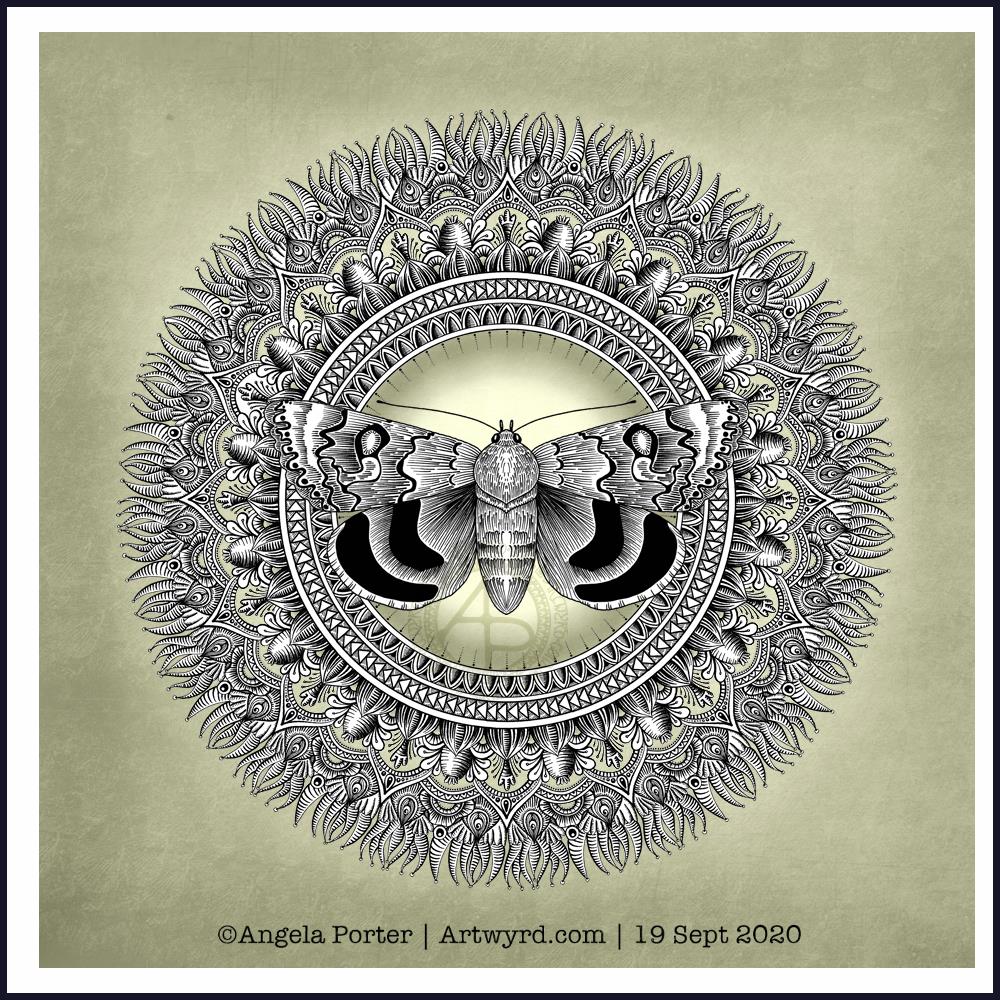
Finally finished! The moth with mandala and entangled background. A4 in size.
It’s taken quite a few hours work to complete this one, but it’s nice that it is finally done.
Lots and lots of my favourite motifs/patterns used in the entangled background – flowers, seeds, seedpods, leaves, arches, spirals and geometric patterns.
Plenty of line work to add depth and volume to the design.
I like that the white area behind the moth means the moth isn’t lost in the background. There are some areas where the resulting values aren’t sufficiently different, but I can live with that.
No colour (other than my watermark). A very graphic design.
I have been working on the moth drawing from yesterday. It’s a long, laborious, yet enjoyable process. So, this afternoon I thought I’d create a mandala to sit behind my moth illustration.
I’m quietly pleased with this one. I like the choice of colour for the background, even though it’s an unusual choice for me. The central glow and shadow helps to lighten the background a little and brings attention to the moth, which is the main motif in this design.
I decided to use just black and white for the moth and mandala, though there are places in the mandala where I’ve let the background show through.
I will continue to work on the other design, it’s just going to take me a couple, or even a few, days to complete.
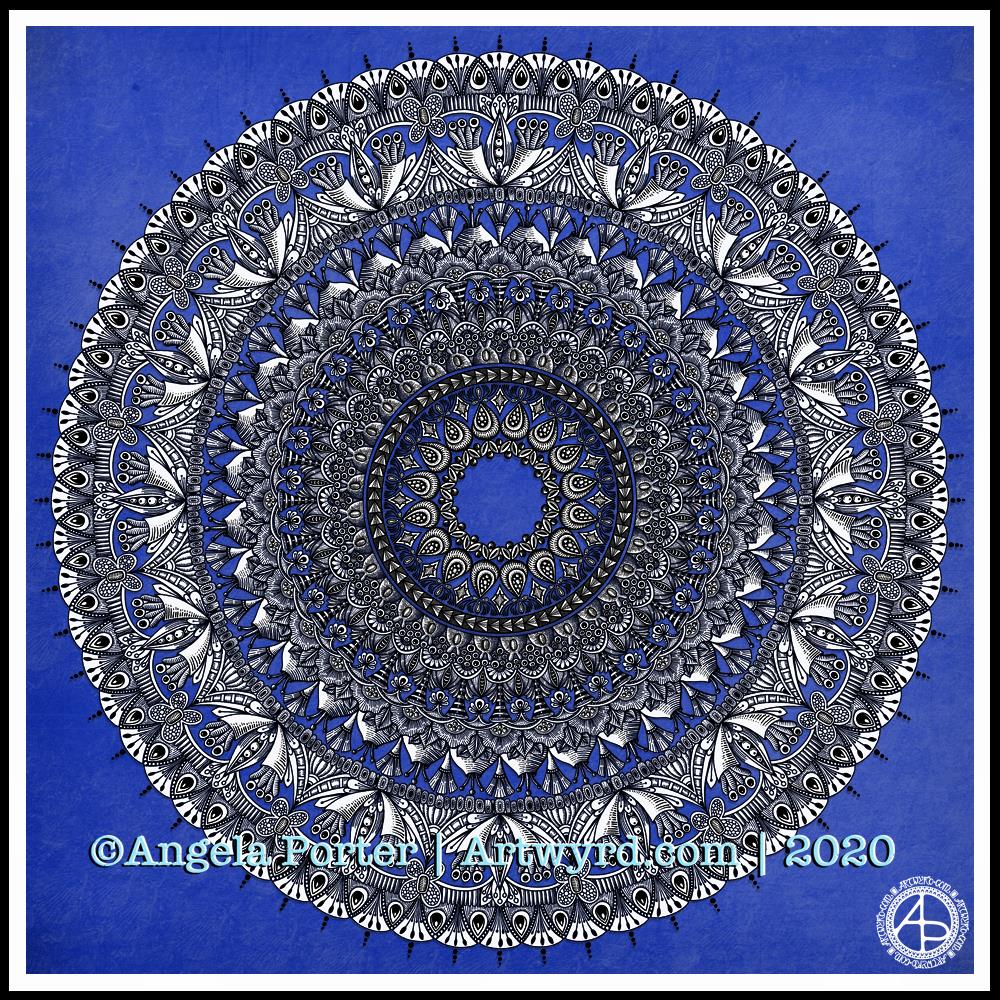
I have been awake since stupid o’clock, so rather than toss and turn for hours I decided to do some art. And another mandala appeared from the tip of my pen.
For this one, I thought I’d make the ‘white space’ areas in the design transparent so that the vibrant blue background could show through.
I’m not sure how well this works; I’m now too tired to think clearly. I do think it has potential for future mandalas, maybe.
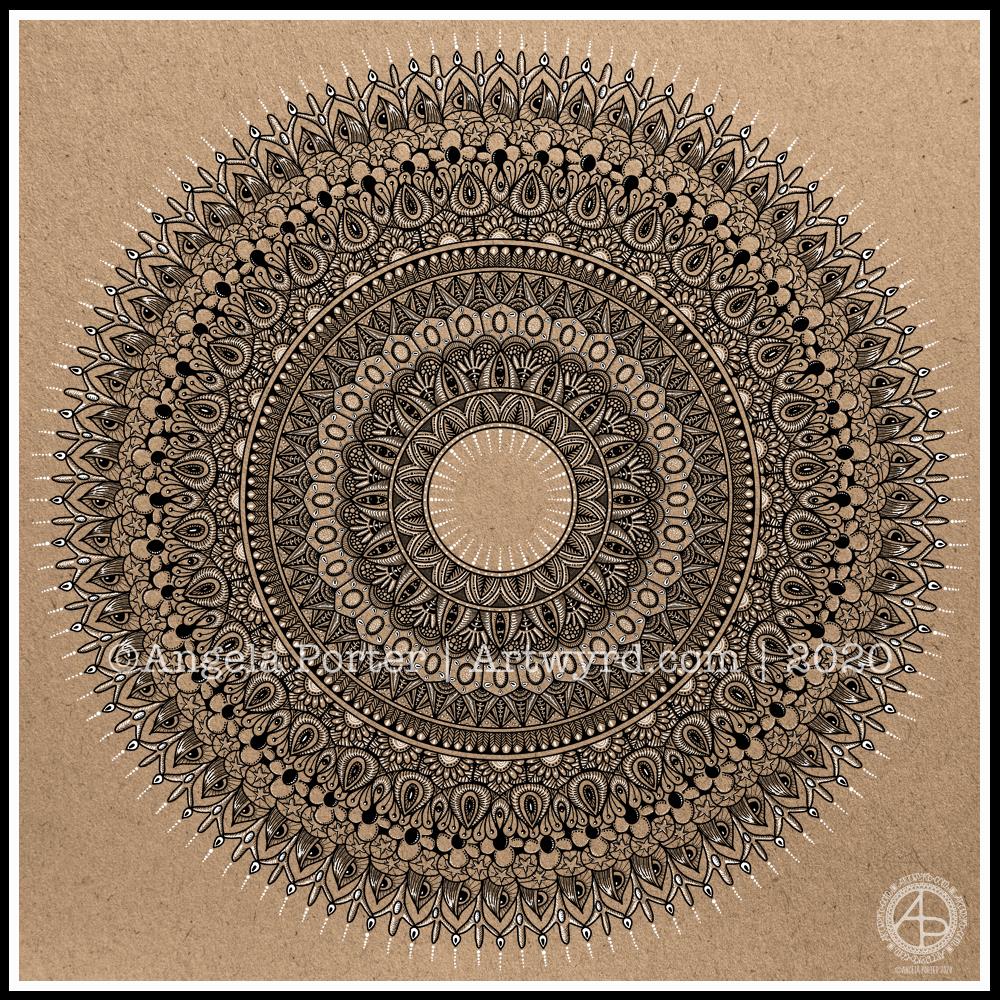
I really enjoyed creating this mandala this morning! I used some of my favourite motifs in this one. it was lovely to use white on the kraft background, to bring out some highlights and add dimension here and there.
I love to use Autodesk Sketchbook Pro to draw my mandalas in. It streamlines the process and allows me to focus on creating the design rather than the mechanics/geometrics. Of course the design is drawn by hand, just as it would be on paper. That’s the beauty of having a Microsoft Surface Studio and Surface Slim Pen – I can draw with the pen on the screen just as I would with pen on paper. The advantages are that if I mess up, it’s easy to correct, and the symmetry tool saves time, allowing me to focus on the fiddly details that I love so much.
Dimensions : 8cm x 8.5cm (3¼” x 3¾”) Smooth cartridge paper (acid free) Uniball Unipin pens (05 and 01) Digital editing and colour in Autodesk Sketchbook Pro
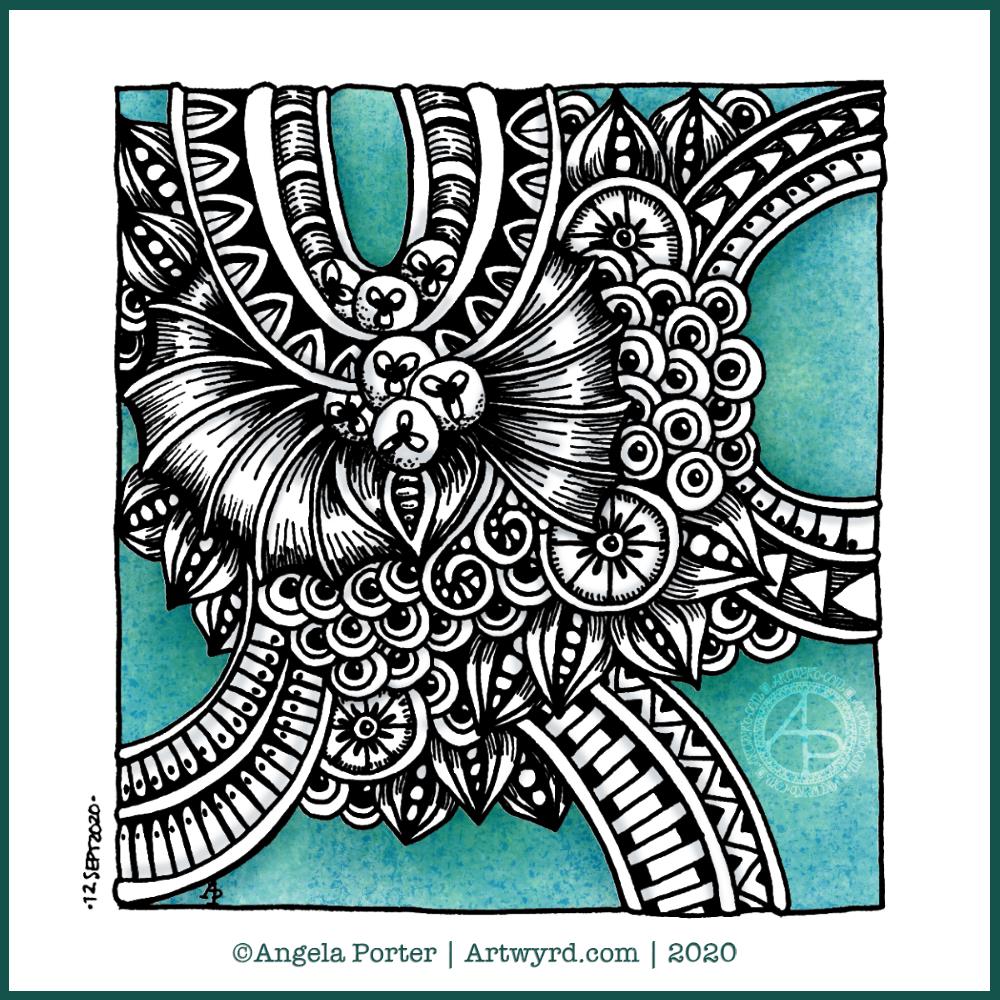
I drew this little drawing yesterday, but spent some time this morning scanning, cleaning and adding colour and shading digitally.
I deliberately left some ‘white space’ so I could fill it with colour. This contrasts rather well with the graphic black and white entangled art design. The coloured background adds depth to the image, and the subtle shading by grey and textural lines adds volume to the design elements and layers.
I often think I struggle with colour, unless I use a limited palette. This is a way to make use of colour in a way that adds interest to the design without detracting from the line work.
I got this monogram finished yesterday evening. I think I may have been a bit heavy handed with shading in some places. However, overall I like it and I like the volume or dimension that the shading adds.
I definitely enjoy working in such a detailed, intricate and organically intuitive kind of way. Having the monogram as a design to work around does help quite a bit.
On a kind of related point, I had a new A5 dot grid notebook delivered yesterday so I can start to make a collection of motifs and patterns as I use them or create them. The idea is I can winnow out those that I never/rarely use. The reason for this is that the dot grid notebook I’ve kept as a visual dictionary for the last couple of years is just about full! I will keep it as a reference, but it’s time to start a new, more relevant one I think.
I have a snazzy, teal coloured notebook, covered in vegan faux-leather. It has 218 numbered white pages that are a tad thicker than the usual dot grid notebook pages, The paper is velvety smooth and a pleasure to write/draw on. It’s made by Wordsworth & Black and I came across it on Amazon. Oh, the ink doesn’t feather, bleed through or ghost on the pages. I paid £15 for it and I’m very happy with it so far.
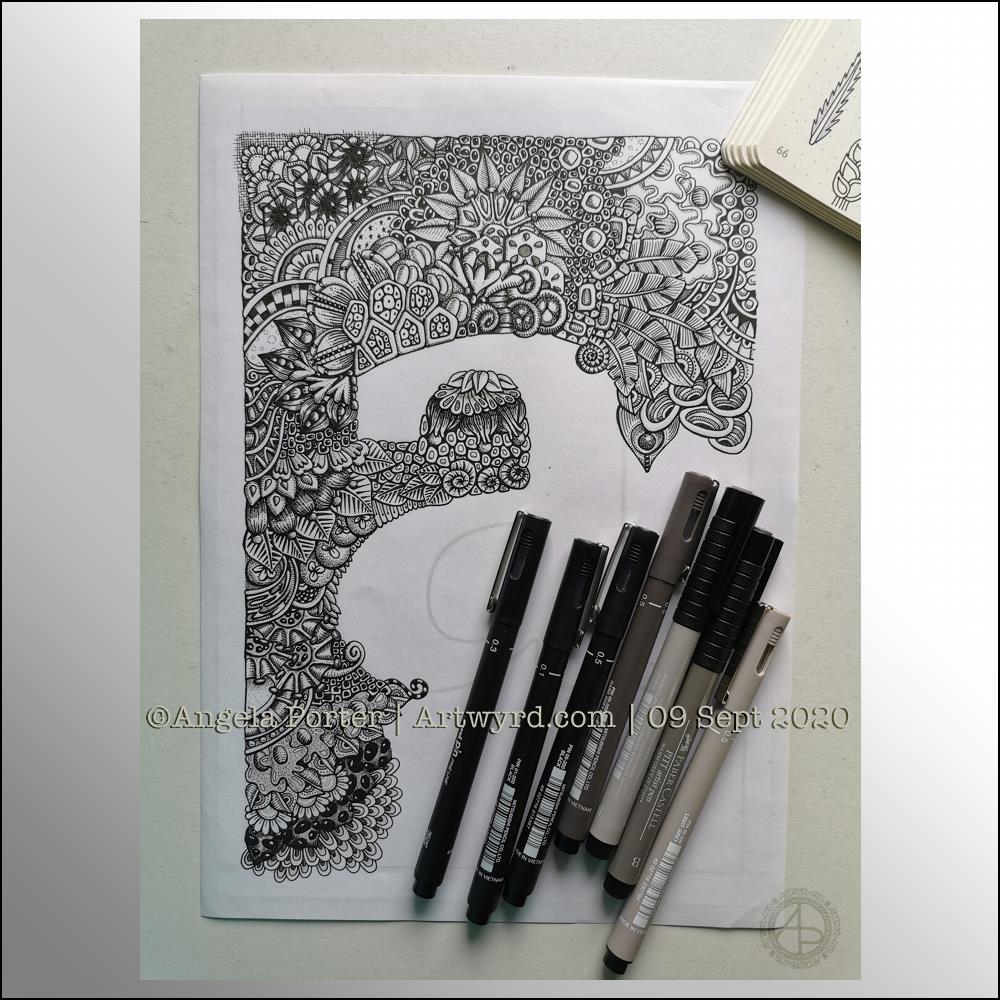
Wednesday is work in progress (WIP) day. So, I thought I’d share my monogram “a” and the progress I’m making on it.
There’s a clutch of pens there! I decided to see if I could add grey to heop areas of the design stand out more, as well as adding some depth and dimension. I figured I had nowt to lose if I tried as the the design was becoming all much of a muchness to my eye. Looking at the image above, it seems to be working well in some areas!
I started using some grey unipin pens to add shades of grey to the design. They worked kind of well enough, but they were picking up pigment from the black and moving it around.
So, I thought I’d see what greys in Pitt Artist Brush pens I had and found some warm greys. They worked better as the colour could be laid down more smoothly.
I do have some new motifs to add to my visual dictionary, a corner of which you can see at the top right of the photo.
I’m not sure if I like adding the greys more than if I don’t add them. I suspect I’ll like them more as I work with them as I love the sense of volume that has appeared in various areas thanks to the contrast they confer on the design.