In today’s YouTube video, I show and try to explain verbally, how to draw a different kind of shell, one step at a time.
This shell is, perhaps, a bit more challenging than yesterday’s. However, when broken down it’s not much more difficult.
Again, I add shadow to the drawings using a graphite pencil and a paper stump/tortillon or, in the case of part of the second shell, pen lines and density of pattern.
I also added some colour to the second shell, using a damp brush and lime green and turquoise Karin Brushmarker Pro pens. The graphite shading shows through the transparent watercolour inks from the pens.. I think this combination makes the image look quite metallic. Not surprising as graphite, as an element, is rather grey and shiny and metallic looking! Actually, it’s just the cool grey tones of the graphite that makes this so!
It’s really a lot easier to show than to explain in words, spoken or written. This is why I’m creating videos. It also makes that part of me that is a retired science teacher happy to use my teaching skills and feed my passion for helping others learn and grow.
In today’s YouTube video tutorial, I do my best to describe and show how I draw a stylised seashell or two from reference photos.
I had a request from one of my subscribers to do this. I find it hard to put into words how I do this, I don’t have conscious thoughts/words about it – I just do it. So, this forced me to slow my mind down and put into words what goes on. And I do hope those words make some sense.
The end results are good enough for my sketchbook, and the spiral shell is perhaps my favourite of all time that I’ve drawn, including realistic, diagrammatic, whimsical and stylised.
I’m particularly fond of stylised drawings. The spaces within them are perfect for adding pattern and texture. All my favourite things combined! Shading, highlight and/or colour can be the icing on the cake or shell.
This was a nice diversion from the lettering projects I have on the go. It was also something quiet, relaxing and soothing and perfect for me. Today, I’m exhausted after a stressful yesterday. It was a good kind of stress, but still stress/anxiety. I knew I’d be doing something yesterday a week ago, and so the stress built up gradually over the week. I’ll gradually recover, but today is a quiet, down-day with plenty of self-care, but not any naps as I’ll need to sleep properly tonight.
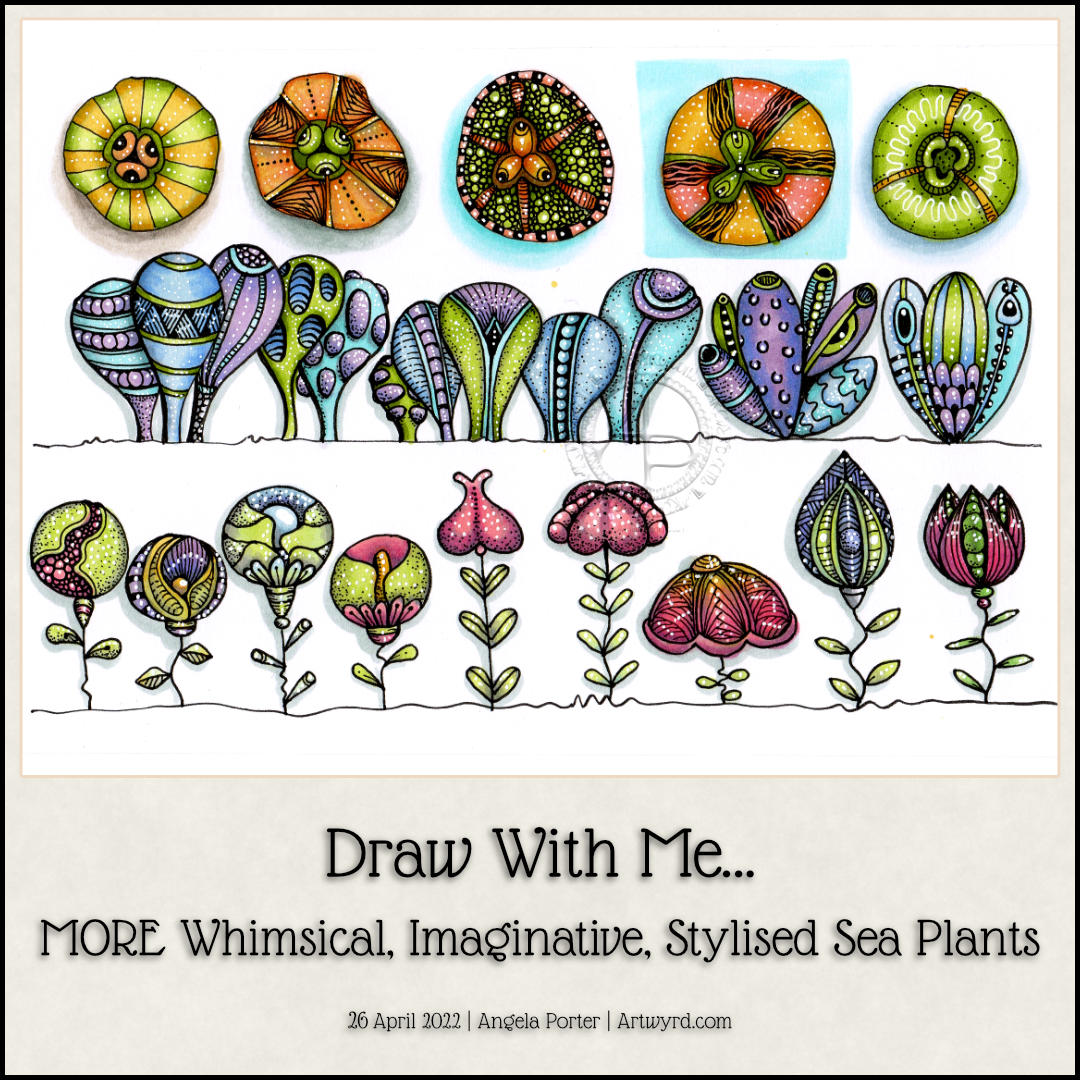
This sketchbook page is now complete! I had so much fun doing this one for sure. There’s a whole host of plants to populate any number of whimsical worlds. There’s a third video tutorial showing how to draw, step by step, the last row as simple line art as well as the start of adding colour and pattern.
Some of the motifs look a bit ‘flatter’ than I like them to, and a couple I’m not quite happy with in terms of pattern/texture. But still, it’s a page full of inspiration and possibility, something I can look back on for inspiration.
Carrying on with the sea-life theme, I filled a sketchbook page with simple drawings of stylised, whimsical starfish, sea urchins and mussel shells. I recorded my process as a tutorial video, showing and explaining my step by step process of drawing. I start with simple shapes and gradually add more and more complexity.
There is something very intriguing and curiosity-provoking about exploring variations based on the same simple shapes and steps. The possibilities are endless and it certainly gives creativity a bit of a workout!
These kinds of exercises are what sketchbooks are perfect for. A sketchbook is a safe place to experiment and explore, and the end result is a valuable resource of ideas as well as a visual record of your development of artistic skills. They’re a place to practice fine motor skills, hand-eye coordination, and for trying out new media or techniques.
Sketchbooks chart the development of our skills, our pattern and motif preferences, and show how we develop and evolve our artistic style.
This revelation about sketchbooks is exciting to me. I don’t know why it’s taken me so long to work this out. I think the Inktober Tangle Pattern Challenge back in 2021, the Fragments of Your Imagination Challenge earlier this year (both challenges hosted by the 7F5R Challenge Facebook group) as well as the Lettering Sketchbook course on Domestika have definitely been significant activities that have helped me reach this realisation.
The other major realisation I’m having at this time is that I think I’ve finally found what kind of YouTube content I like to make!
I was a science teacher for 28 years. Teaching is part of who I am. My focus as a teacher was always to inspire and encourage my students, to help them to believe they could do science, and to have better self-esteem and self-confidence. I loved to see them grow and develop and gain skills and knowledge they never thought they could, and that was a wonderful thing to be a part of.
If I can do the same thing for others, who have no confidence in drawing. If I can use my love of whimsical and stylised art/motifs, the function of a sketchbook to encourage others to take up pen and paper and draw, then that is a good thing!
I also think it’s important that I show my process, warts and all. Variations that are lovely, and others that are not so. It’s all part of the process of developing as an artist. I think my work with traditional coloured media is a testament to my ability to make a total mess of a fairly nice drawing! I am better with digital colours, but not much!
It all takes time to work these things out, and I can be really dense and stubborn at times! But I do get there … eventually. ‘There’ being a point of understanding myself and accepting something or a sudden revelation, you know the kinds of things. But ‘there’ isn’t the final destination. The journey of exploration and development never ends, and a sketchbook is now, for me, a vital companion going forward.
The flowers are all rather whimsical and stylised, but that’s no bad thing. I’ll never stop thinking that we need some more whimsy in this turbulent world (and that’s putting it mildly!). If I can create a little world of beauty and whimsy with pen on paper, then I think that’s a good thing. And it’s even better if others can use colour to bring the worlds to vibrant life, or can learn how to draw their own whimsical worlds too.
I was a science teacher for 28 years, until I left to focus on my mental and emotional well being as well as art. My desire to help others gain confidence and inspire them to learn new skills, to find enjoyment in this process, then that’s a good thing too.
I took a short break from social media over the last couple of days. I had other things that needed to be done, not least a trip out for brunch in a local cafe with a friend. That’s the first time in over two years I’ve eaten out!
I was highly anxious and stressed, but had a lovely time. The cafe was quiet, thankfully. The food and drink were delicious. It’s our new favourite cafe to go to, one that’s close to us both as we, like most people, are mindful of the cost of fuel at the moment.
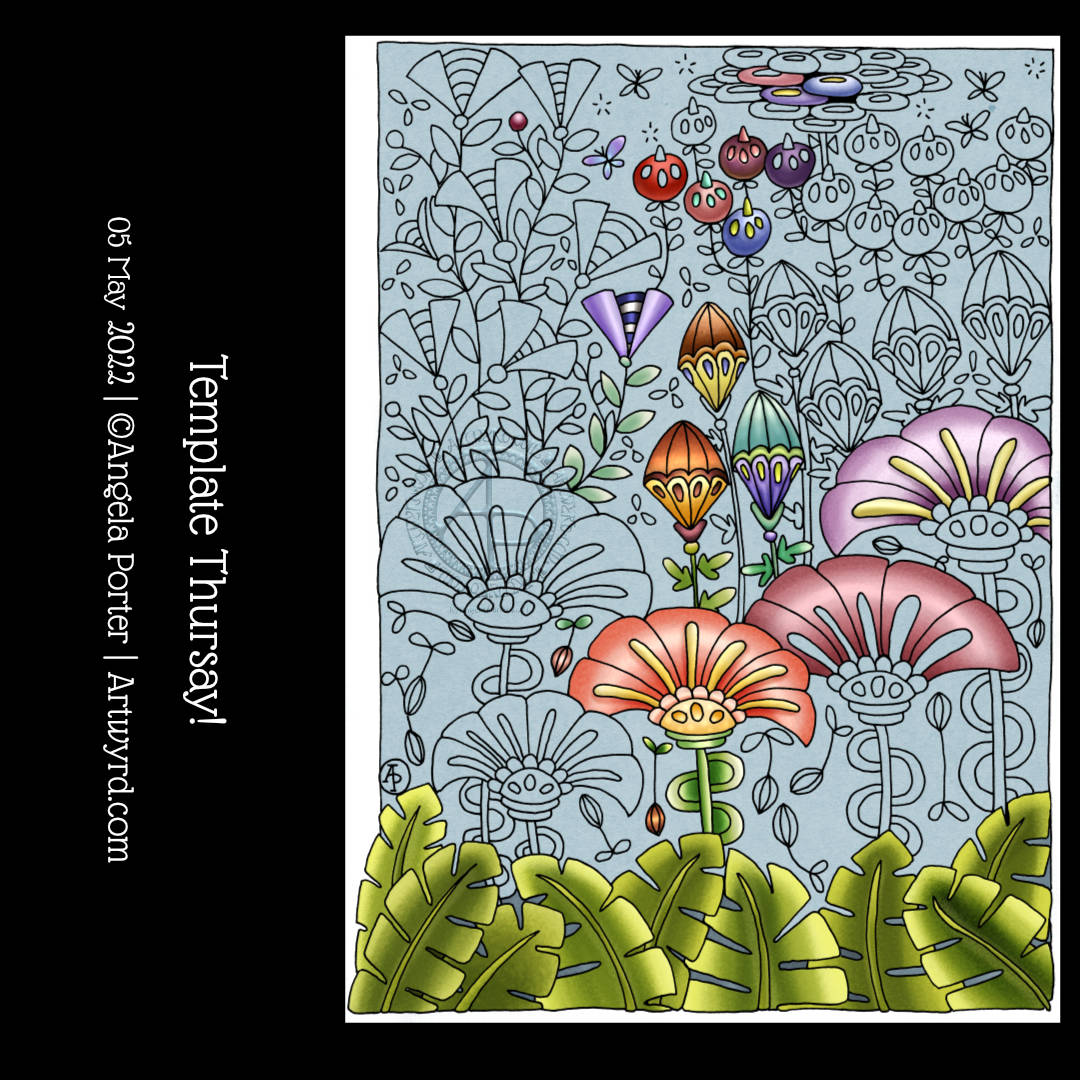
The comedown from anxiety and stress leaves me exhausted, and unable to focus my mind. So, some simple colouring of my whimsical flowers sketchbook page from my last blog was just the thing I needed. Nothing to tax my mind. Sketchbook work is a place to experiment, practice, and enjoy the creative process with no pressure for anything to be perfect!
To add colour I used a mixture of Pentel Brush Sign and Tombow Dual Brush pens, along with a water brush. Both of these pens are filled with water-soluble inks and so work a bit like watercolours. I feel I have much more success with these media than I do watercolours, especially as the colours are so bright and vibrant – saturated I think the arty term is.
Just a bit of colour brings the line art to life. It’s its own kind of magic.
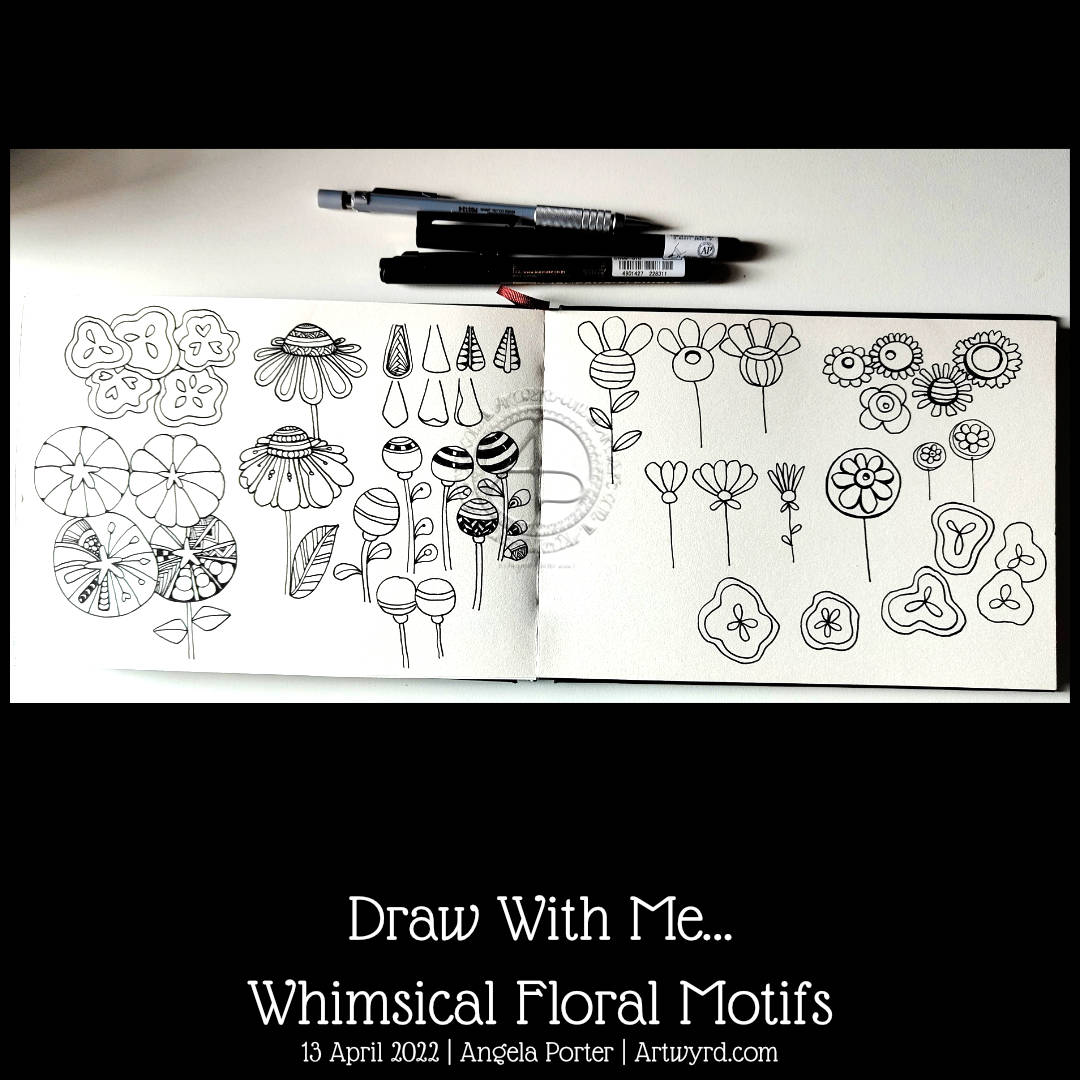
Yesterday, I was working in my lettering sketchbook and came up with some letters embellished with mushrooms. That led to me having the idea to show you, step by step, how I draw some of my favourite mushroom motifs!
I absolutely love mushrooms. They’re fun and funky and the whimsical, fanciful, stylised versions here are simple to draw, one little pen stroke at a time. Why not have a go? Take a look at today’s ‘Draw With Me’ video tutorial on YouTube.
On the weekend, I like to do an artwork of some kind using some of the pattern or motif variations that I’ve developed in the week. This week, the seed pods and flowers just needed to be used in some way.
I thought of lettering the word ‘peace’ but decided on using the peace symbol as the focal point instead. Being born in the early 1960s, I do remember hippies, flower power and the peace movement, so popping plenty of flowers and foliage around the symbol seemed the right thing to do.
The seed pods fit in well, and the song ‘Sowing the seeds of love’ by Tears for Fears came to my mind too. so doubly fitting the message of peace.
Naturally, there are some hearts hidden in there too! And the plumptious moonberry blueberries too, adding some delicious goodness too.
The green background was a tad serendipitous. Partway through the drawing, I remembered that green is symbolic of peace and harmony, among other things. Rather fitting!
I’ve only got the skeleton of the design done. I’ve yet to decide on how to add colour, shadow and/or texture. So, I’m taking a bit of a break from it for my mind to mull things over subconsciously. I think I’d better scan the page before I do anything more to it though! Things tend to go awry when I start to add colour etc.
There are never enough flowers in my life. I’ve really enjoyed drawing flowers (and seed pods) over the past couple of days. So, I thought I’d make use of one of the flower motifs from yesterday to create a border on a page edge in my sketchbook.
I like the graphic contrast of the black background and the flowers and foliage. It’s going to be a lovely page to make notes or record thoughts about whatever I’m drawing in my sketchbook at this time.
If you’d like to see how to draw this, and follow along with me, then please take a look at today’s video on YouTube.