I love Halloween; it’s one of the few celebrations in the year that don’t fill me with deep sadness and cause emotional distraught. And, of course, when it comes to me, cute and whimsical, smiley and pretty is my preferred style of illustration.
I thoroughly enjoyed drawing this design earlier today. My whimsical heart was filled with joy as I just a few of my favourite things. I’m sure there’s a song there…
“Hats upon skull-ies and batwings on potions, mushrooms on bottles and bright orange pumpkins, Some stripy tentacles with round eyeballs, These are a few of my favourite things.”
Well, it doesn’t rhyme, but it’s a start!
So whatever you are doing today, however you are celebrating, or not, I wish you the very best!
After losing this morning’s video (or so I thought – more later!), I decided to have another go at Finery and record it.
I started with an A6-sized piece of mixed media paper and used the black side of a piece of Cut’n’Dry foam to add Distress Inks – Seedless Preserves, Dusty Concord, Saltwater Taffy and Spiced Marmalade. These colours gave a warm, almost autumnal feel to the paper, a contrast to the grey-green paper I’m using for my Inktober Tangles sampler.
Next, it was time to tackle Finery for the second time today. This wasn’t without some trepidation. I know how this tangle vexes me. I decided to use a plumptious Sumu motif for the finery grow from. After drawing that, I added the veins of the Finery. A happy accident led to the multiple leafy stoppers on these.
Then, it was the tricksy bit, adding the lines to create some Finery.
And would you believe it, I actually did it as the pattern was intended! I was shocked but pleased.
I used Inktense pencils (Thistle, Sienna Gold and Dusky Purple) to add the shadows. Finer 01 and 03 Unipin pens allowed me to add the filler patterns into the reticular (grids) of the Finery. Finally, a white 05 Gelly roll let me add subtle highlights, which make a difference.
I’m actually pleased with the outcome. This made a nice change from the Inktober Tangle sampler and from some other art I’ve been playing around with lately.
The curious case of the self-deleting file…
The mystery of the deleted video file has been solved! I saved this file and couldn’t find it. Then, I remembered I’d updated the video editing software I use and hadn’t changed where I, not the software, wanted the videos saved.
So, I went on a hunt to seemingly the most arcane regions of my computer’s hard drive. I couldn’t find anything. And then I was struck with a flash of inspiration – open the app in the software for recording from cameras and see where it’s saving it!
Ta-da! I found not only this video but the one I thought I’d deleted by mistake! I chose to go with this video for a bit of a change from the Inktober Tangles sampler.
Earlier today, I just wanted to explore a simple Zentangle Pattern fragment, or two. I started with two square fragments, each with a circle in the centre. One had a diagonal cross, the other vertical/horizontal. And I went from there to create some more ornate versions of them.
I never know where this kind of exercise is going to go, but it is always interesting and some pleasant kinds of fragments result.
These are just a few fragments I came up with during the course of the video; I’ve barely scratched the surface of all the possible variations.
This exercise is good for flexing your creative ‘muscles’, warming up hand-eye coordination and fine motor skills, and playing around with colour, shade and highlight. Also, it’s perfect for relaxing, taking a break from all that is happening in this world. Even if for just a short while.
Phew! It’s another scorcher already! I feel so drained, and it’s not even 11am. Mind you, I have been awake since around 5am, again.
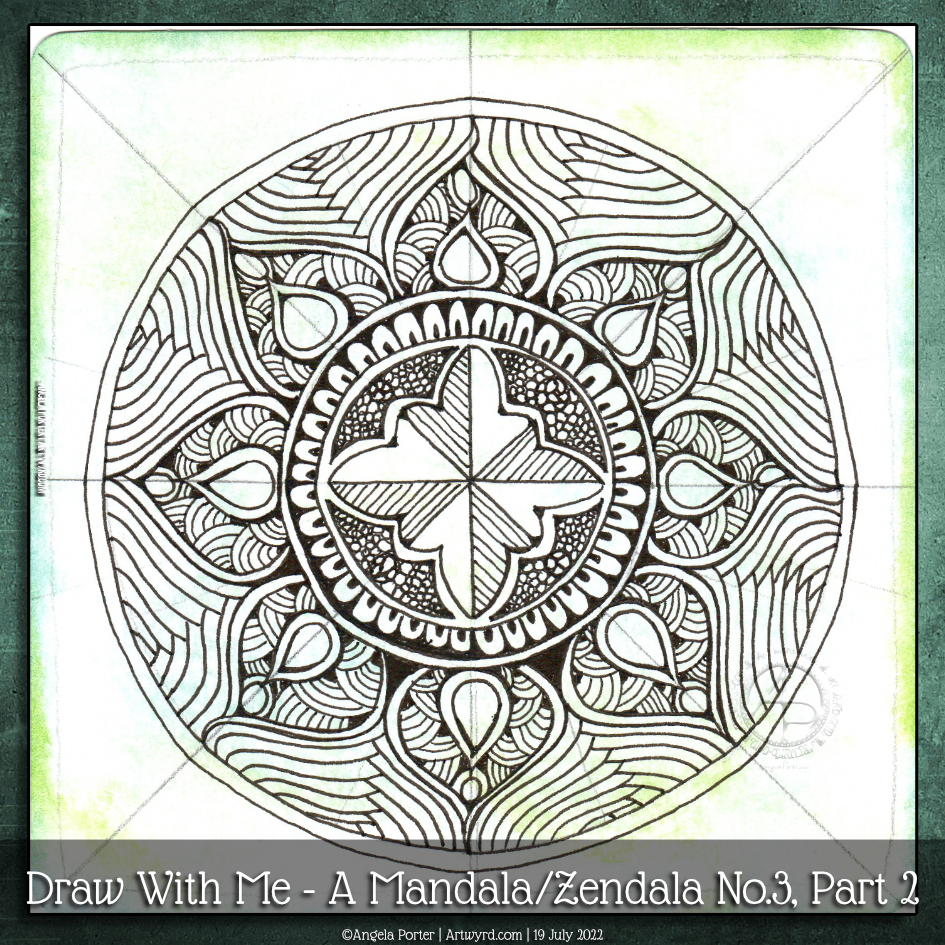
Waking early has it’s benefits in this seriously hot weather; it’s cool enough to get some things done early on. Such as today’s video where I draw some more of this mandala.
I’m quite happy with how this mandala is taking shape. I know that shadow/highlights, and/or colour will really bring some dimension to this design. But first, I need to finish drawing it. And work out how to set my scanner up so the background colours don’t get washed out…
Today is not the day for that. It’s way too warm, and I need to retire very soon to a cooler part of the house.
I’ve been busy inking in colouring pages (or templates if you prefer) for my next book – “Fanciful Birds” in the Creative Haven series. But at lunchtime, I took a break to do some drawing. And I drew another bird!
Actually, I started to plan out and draw an A5-ish-sized pen drawing that includes a bird, flowers and so on, all done in a whimsical, fanciful style.
In the video, I explain my thinking process as I lay out the basic design in pencil. And I do it all one step at a time, including the inking in the section I’ve already done.
Of course, the drawing isn’t finished… yet. This is but part 1 of a series. And given I have to focus on the inking in of templates, my videos may be more sporadic than usual, as will my social media posts. So please bear with me!
I seriously need some more tea and probably something to eat; it’s just about tea-time here as I type!
Please click on the ‘Watch on YouTube’ option. Cheers!
In today’s tutorial video, I enjoyed drawing on one of my Neocolor II backgrounds. And I’ve just remembered I forgot to scan the background before cutting and drawing on it. Oh well. I’ll just have to make another one!
Anyhoo, I sometimes forget how much I enjoy working on a coloured background. The colours add an instant “feel” to a drawing. This one reminds me of sunrises and sunsets and the joy and awe that I experience when I see them. So, it was natural I’d choose a few of my favourite motifs to start filling this A5-ish sheet with pen drawings.
Of course, it’s lovely to share how to draw these motifs with others, helping them along their arty journey.
I thoroughly enjoyed drawing this ‘I’ in today’s video. The combination of hand lettering and using various patterns and motifs… well it’s a match made in my idea of arty heaven!
The pencilled letter is just a space to add patterns to, and they can spill out of the lines just a little.
Drawing with a fountain pen (EF TWISBI Eco pen filled with dokumentus ink by Rohrer and Klinger) was an absolute delight! The paper I used was nice and smooth, and even though there was a bit of feathering, I was fine with that; it adds character and a human touch.
The more I do letters like this, the more I become comfortable with this kind of hand lettering.
For now, this will live in one of my lettering sketchbooks, along with, eventually, the rest of the alphabet. They’ll be a resource to dip into for some inspiration at later points in time.
I’ll also need to work out if I leave the letters as they are or whether I’ll try adding shadows and/or colour. I’m undecided on this.
The letter may be a bit on the wonk, but I’m quite happy with it. It makes me smile when I look at it and remember the process of drawing. That means it’s good enough!
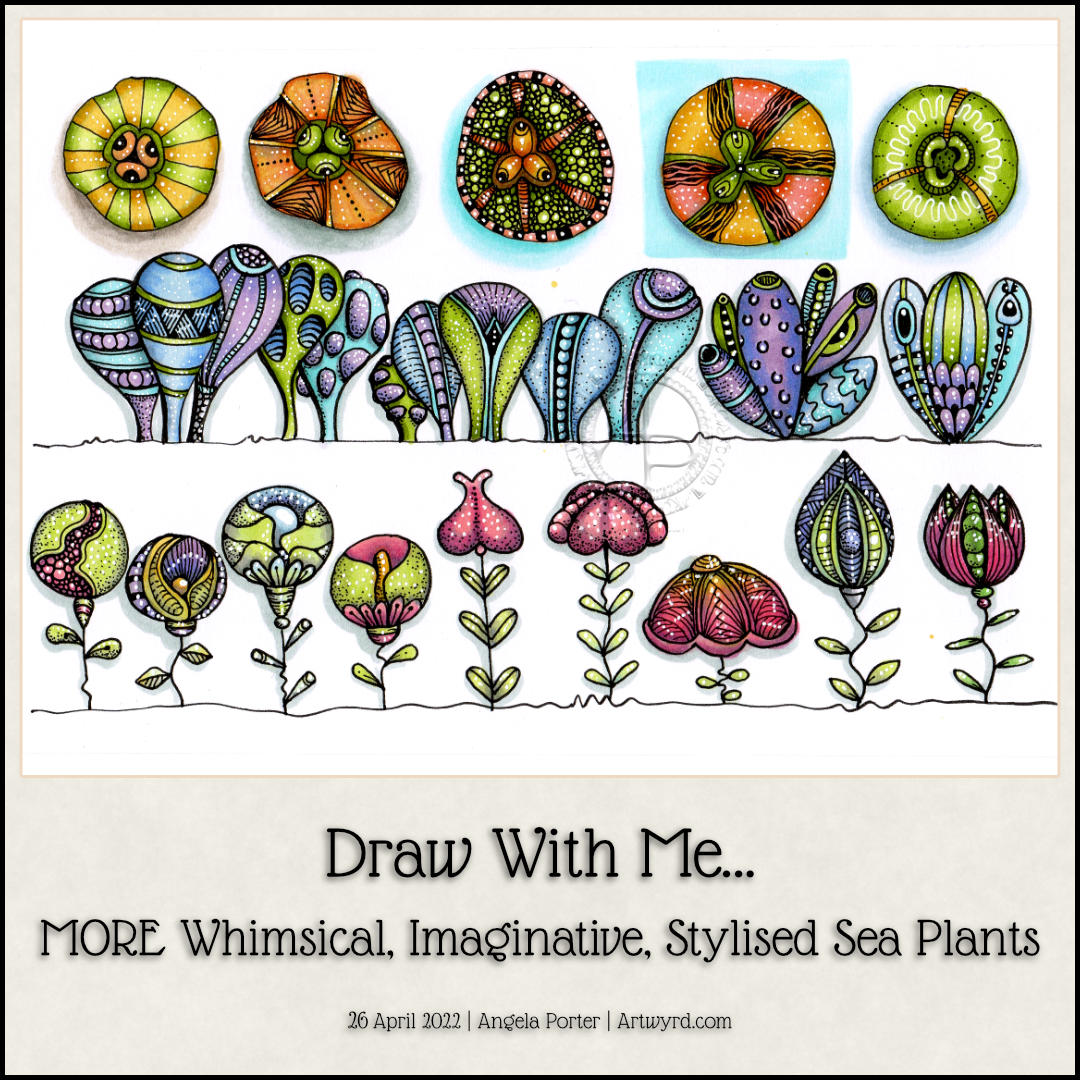
This sketchbook page is now complete! I had so much fun doing this one for sure. There’s a whole host of plants to populate any number of whimsical worlds. There’s a third video tutorial showing how to draw, step by step, the last row as simple line art as well as the start of adding colour and pattern.
Some of the motifs look a bit ‘flatter’ than I like them to, and a couple I’m not quite happy with in terms of pattern/texture. But still, it’s a page full of inspiration and possibility, something I can look back on for inspiration.
I continued the theme of sea plants today with a row of clusters of variations on a shape. Seriously, just one basic shape with small variations from cluster to cluster. The YouTube video that accompanies these drawings takes you through how to draw them, one step at a time.
Of course, I don’t stop with the main shape being varied. It was a lot of fun to add simple patterns and textures to these plants (or creatures if you will).
Alcohol markers in an analogous colour scheme of violet, blue, blue-green and yellow-green were used. The yellow greens were a late addition as I felt the first cluster needed an extra colour. The yellow-greens also link this row to the first one done yesterday.
The final steps are adding the detailed patterns and textures using both a black 0.1 fineliner and a white gel pen.
Oh, I did use a couple of cool greys to add shadow to the drawings before I added colour.
I’ve just realised I haven’t put any drop shadows behind these plants, or sea squirts, or… Maybe I’ll do that before tomorrow’s video session!
Finally, the page is as full as I’d like it to be of oyster shells! I did some hand-lettering before filming the video. I just wanted to add a quote about oyster shells and practice hand lettering.
I really enjoyed drawing all of these shells. The last one, a more whimsical one than the others, is my least favourite. It did, however, give me the chance to do something a little different when adding textures.
I really didn’t think out the layout of the hand-lettering. Maybe I’ll work that out, eventually. Maybe!
Overall, I now have a great reference page in my sketchbook as far as oyster shells are concerned.
I may do some further work on this page. Part of me wants to add words/quotes/facts as a background to at least one shell. I’ll see how I think about that after a little break from it.
In the process of drawing this page over the past five videos, I’ve gained some insights and understanding about my motivation to start a YouTube channel. I didn’t seem to have any clear purpose for making the videos, but with time and working on it all I think the pennies have finally dropped. That’s a good thing, maybe. All I have to do is to keep this purpose in mind (and remember it!). Fortunately, I’ve recorded my ah-ha moments in a journal, just in case I need to refer to them.
Now all I need to do is work out the next motif to focus on!