Although I didn’t tackle all of the triangular fragments in today’s video, I enjoyed sharing some explorations, along with the little bit of an overall pattern that came about almost accidentally!
I’d almost forgotten how much fun it is to use a basic shape and see how it can be turned into a fragment of a larger pattern. Then, create variations on this theme. Some of the fragments are from the Zentangle Primer Vol. 1, others are variations that resulted.
Please click on the “Watch on YouTube” button. Cheers!
I had a lovely time this morning adding colour to yesterday’s drawing.
To be precise, I chose to use Arteza’s EverBlend markers. I’m not at all sure about that green at the moment, but it may look quite different when I’ve finished colouring the drawing in.
In the video, I focus on explaining my method of adding colour and showing how I’ll add colour and contrast to each section of the design.
It’s blessedly cooler this morning as I write this blog. There’s been a little rain, but not enough to help out nature. We have the potential of thunderstorms and torrential rain at some point today. I do hope we get some thunderstorms – I love nature’s fireworks and drama! Rain is fine, but torrential rain can cause huge problems.
Anyhoo, to arty things. There are two drawings in the photo. I completed the one on the right on Sunday and filmed a video tutorial. It explores a new fragment shared on day one of Zentangle Project Pack 18. It’s always fun to explore patterns; I get to understand the pattern more and discover variations.
One of those variations came out in my sketchbook on Sunday evening. I used the ideas of the fragment as a way of filling space. What resulted looked a lot like the tangle pattern Diva Dance. you can see this in the drawing to the right in the image above.
It never ceases to amaze me how patterns can segue one into another as variations are explored. Everything, even tangle patterns, is interconnected and related by not that many degrees of variation!
Of course, I filmed the drawing of the flower and tangle pattern tile as a video tutorial. Hopefully, slowly and clearly enough that it’s easy to draw along with me. I hope you give it a go!
Phew! It’s really hot again today here in the Valleys of South Wales, UK. And in many other places too. I’ve slowly been wilting through the morning. However, I was determined to get a video done and uploaded before I find somewhere cooler in my home for the rest of the day.
I had a really poor night’s sleep, and so I’m also struggling to keep awake. But keep awake I must. Delivery is due in the next three hours or so, and then I have errands to run.
So, my frazzled emotions, sleep-deprived brain and overly hot body really wanted to do some art that was soothing, comforting and simple. I knew I had this circular piece of paper already coloured with Distress Ink, so all I needed was a tangle pattern or two to add some pattern to it.
A very quick look on Tanglepatterns.com, and I saw Calibree by Nancy Domnauer CZT and thought it perfect. It’s got an uneven grid pattern, so it will deliberately turn out all lovely and wonky. I actually feel rather wonky myself today, so that fit perfectly!
I decided to stick to a monochrome colour scheme, again keeping it simple. You can see the whole process and materials I used in the video.
Although I may not have made the best choices with some of the colours, I’m fairly pleased with how it turned out. I’m also really pleased with how it picked up my mood as well.
Wednesday is the week’s halfway point, and the day I start to draw this week’s colouring page for Angela Porter’s Coloring Book Fans Facebook group members.
I was awake early, the air was cool-ish, and starting to draw this week’s page and film it seemed a very sensible idea before the day warmed up.
Here in the UK, we have amber weather warnings for very high temperatures for the next few days. Not quite as high as a couple of weeks back, but too high for me to be comfortable. So, I aim to get as much done as possible before I have to either nap or retire to cooler parts of the house with sketchbook and pens! And probably fall asleep even then.
Anyways, my thoughts for this week’s colouring page were to create four smaller panels, each of which would make a lovely greetings card or postcard once coloured. I like pages that can be used in other ways, though I don’t create them often enough.
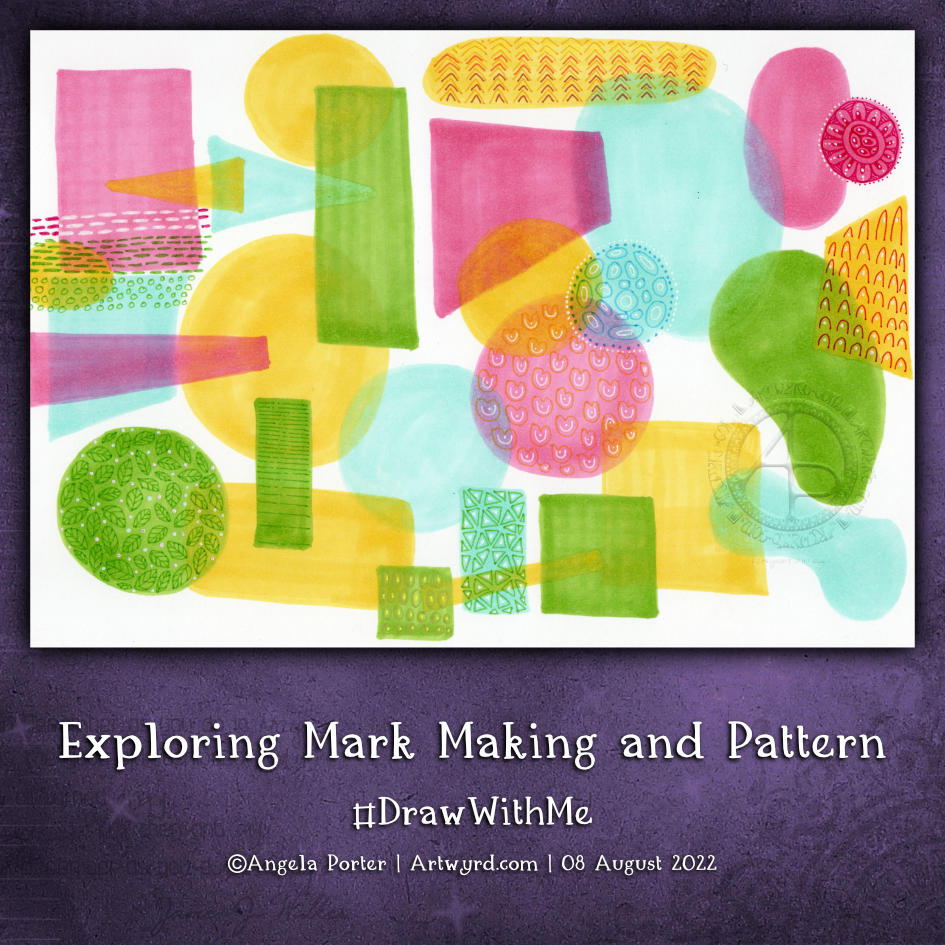
I had a lot of fun with this sketchbook page. It’s well out of my ‘comfort-zone’ as there are absolutely no black lines, not even the lines that define the basic shapes.
This is inspired by illustrator Kate Sutton, whose Domestika course I started watching yesterday. And there’s another project I have on the go that is inspiring me to explore this kind of drawing.
I’ve tried this before, but felt so uncomfortable with it that I gave up very quickly. Today, I was determined not to use any black lines at all. Instead, I picked a colour palette of just four colours of Arteza EverBlend markers. For each colour, I chose a similar one from my set of Zig Writer pens.
I started by creating the collage of simple shapes using the markers, overlapping them so that the colours mixed. I was careful not to mix the pink and green; I didn’t want to make mud!
Once I was happy with the basic design, I used the Zig writers to add patterns made from simple marks. To begin with, this felt really awkward, uncomfortable, and just plain wrong. However, the more I did, the easier it became, and the more I liked what was happening. I’m so glad that I persevered!
I dug out a white gel pen to add some brighter, lighter marks and to play with the ‘stitching’ to the top right. The idea that I was using pen ‘stitching’ to connect shapes and patterns amused me.
Using the white gel pen reminded me I had other gel pens to use, and use them I did.
I love the translucency of the marker pens and the way that the patterned shapes seem to float. The use of monochrome colours in these shapes, along with white, just gives an airy, delicate feel to them. I can now see the value of this way of using no black line. I have a lot more exploring and experimenting to do. My mind is ticking over how I can make use of this in a project I’m developing at the moment.
As eager as I am to continue my explorations, I have an errand to do first. But when I return home, well, I’m going to try out some of my ideas both on paper and digitally and see where this takes me.
I had a very intensive, focused, and interesting time delving into the realms of digital art earlier today. When I’d finished, and had a late lunch/early dinner, I thought I’d do some drawing just for fun.
I had no idea what I was going to draw, not a single idea. I had a blank page in an A4 sketchbook, a couple of pens and of I went! And something whimsical and Doodleworlds-y appeared!
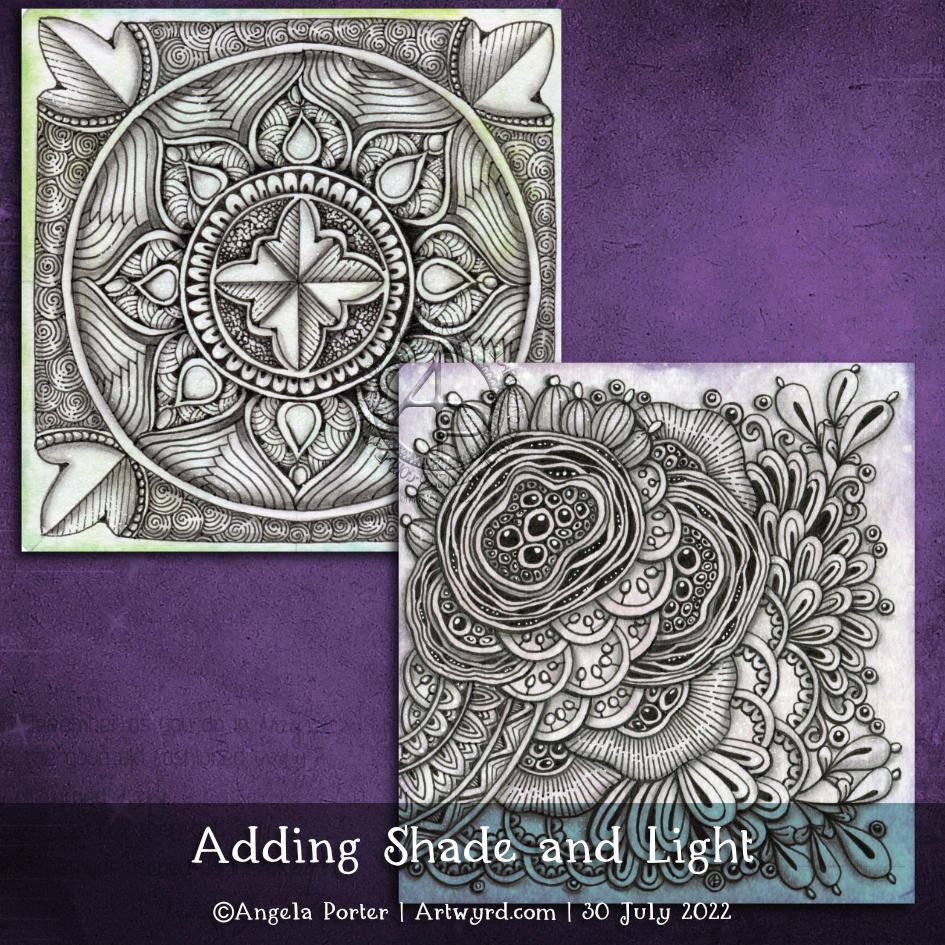
This morning I spent over an hour adding shadows and highlights to both of these drawings and filmed them for you on my YouTube channel.
I used a paper stump (tortillon), graphite pencils and a white gel pen to cast the magic of shade and light, resulting in volume and dimension.
And I do mean magic! The drawings go from fairly ‘flat’ looking to having the illusion of dimension. That’s magical if you ask me.
Graphite is not my favourite medium. But I just couldn’t decide on how else to add shade. I’m fairly happy with the result, and that’s all that matters isn’t it?
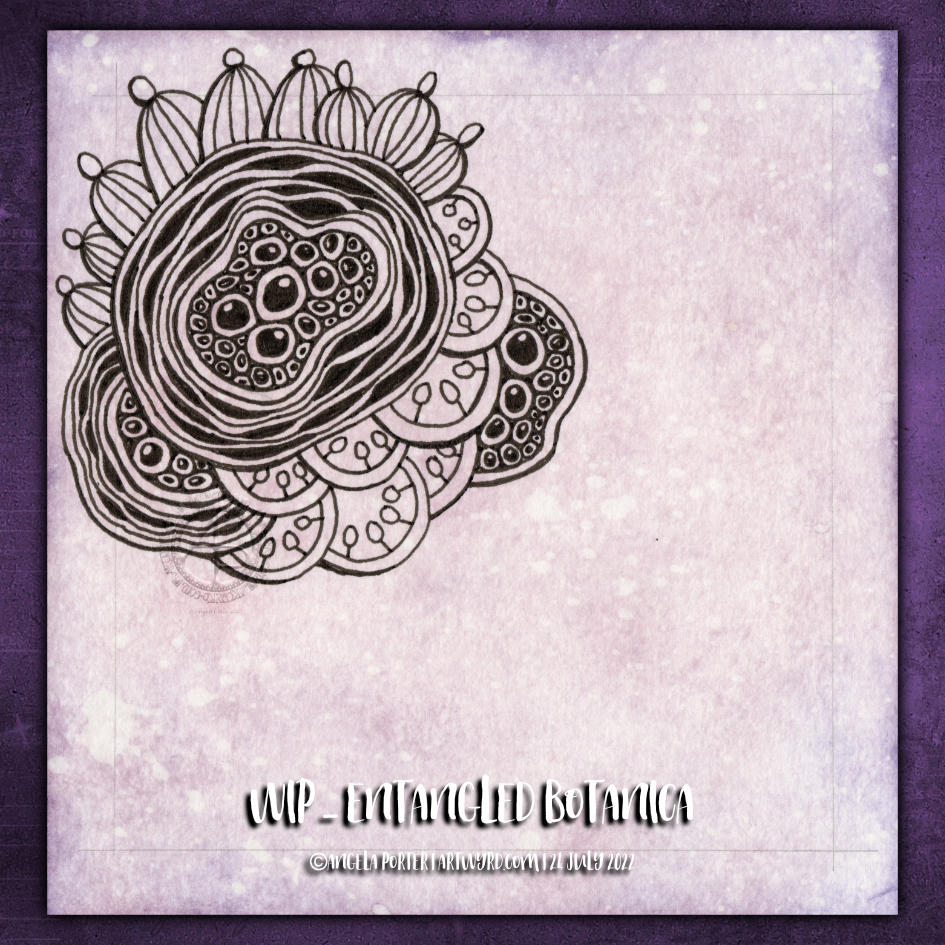
Botanica. Botanicals. Abstract, stylised and imaginary seed pods. Pen drawing. Entangled, intricate, with a touch of the Zentangle tangle pattern Diva Dance.
All some of my favourite things to draw. No idea how it’s going to turn out, just letting it flow as it needs to. One of my favourite ways to create!
And there’s a video showing how I drew this design, as far as it’s got, over on YouTube, if you want to draw along with me!