Tiny Tiles – Zentangle Inspired Art for Random Acts of Kindness.

Click on this link to view the accompanying video on YouTube.

I had an idea. It may not be a great idea. It may not be executed in the best way today. But it’s a start, but first, some background as to how this idea came about before I explain myself.

Last week, I went to a local café for a late lunch. So late that it was almost tea time! The first time I’ve been out for lunch by myself since the start of the Covid pandemic. I’ve had lunch out three times with a friend in this time, but I still rarely leave my home for such things.

It was a lovely lunch, broccoli and stilton soup with a large pot of tea. The people working in the cafe were lovely and helpful. The food was delicious and beautifully presented. I was made to feel very welcome there.

So, it took a few days, but yesterday I woke with an idea. Why don’t I do some tiny artworks to leave for people to discover. Little notes to thank those who run a café or restaurant. Little notes of kindness, inspiration, or compassion are on the back for strangers who may need to read them. Little notes to brighten up someone’s day. And maybe put my email address/blog address on there. Maybe. I’ve not decided if that will be a thing, yet.

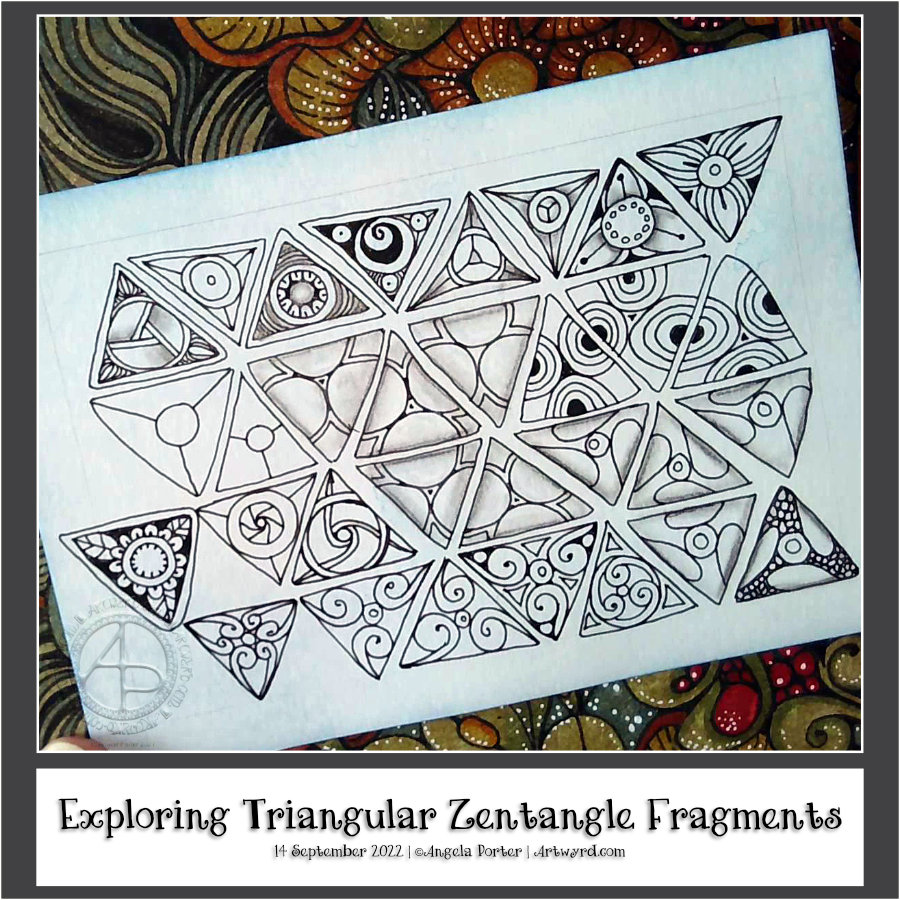
So, the first step was to see what sizes of little envelopes I could buy. I really wanted glassine ones, so the tile is protected but visible. But the only tiny ones I could find were 6.5cm square (that’s 2.5″). So some have been ordered, and some watercolour card has been cut into pieces 6cm square, ready to use! The tiles in the image are 6cm square in size. So quite tiny!

The others I found are so sweet. They have a heart fastening on the rear flap and are made of kraft paper. Perfect! That way, what’s inside will be a surprise and, hopefully, a pleasant one for those who find it. These are a bit bigger at 10.5cm x 7 cm (approx 4.13″ x 2.75″), which is about the size of a gift card, business card or credit card. So, I cut paper to 10cm x 6.5 cm to fit these envelopes.

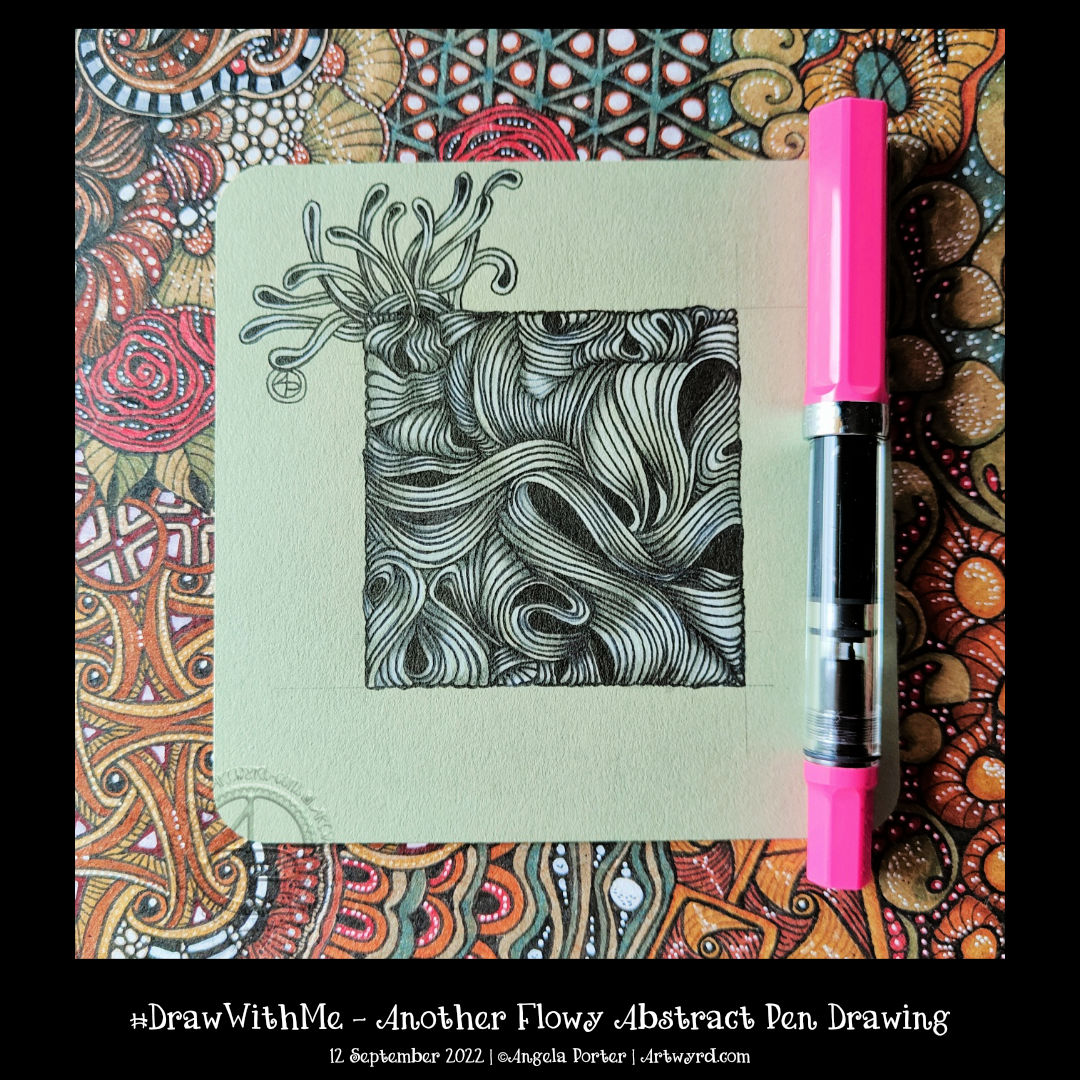
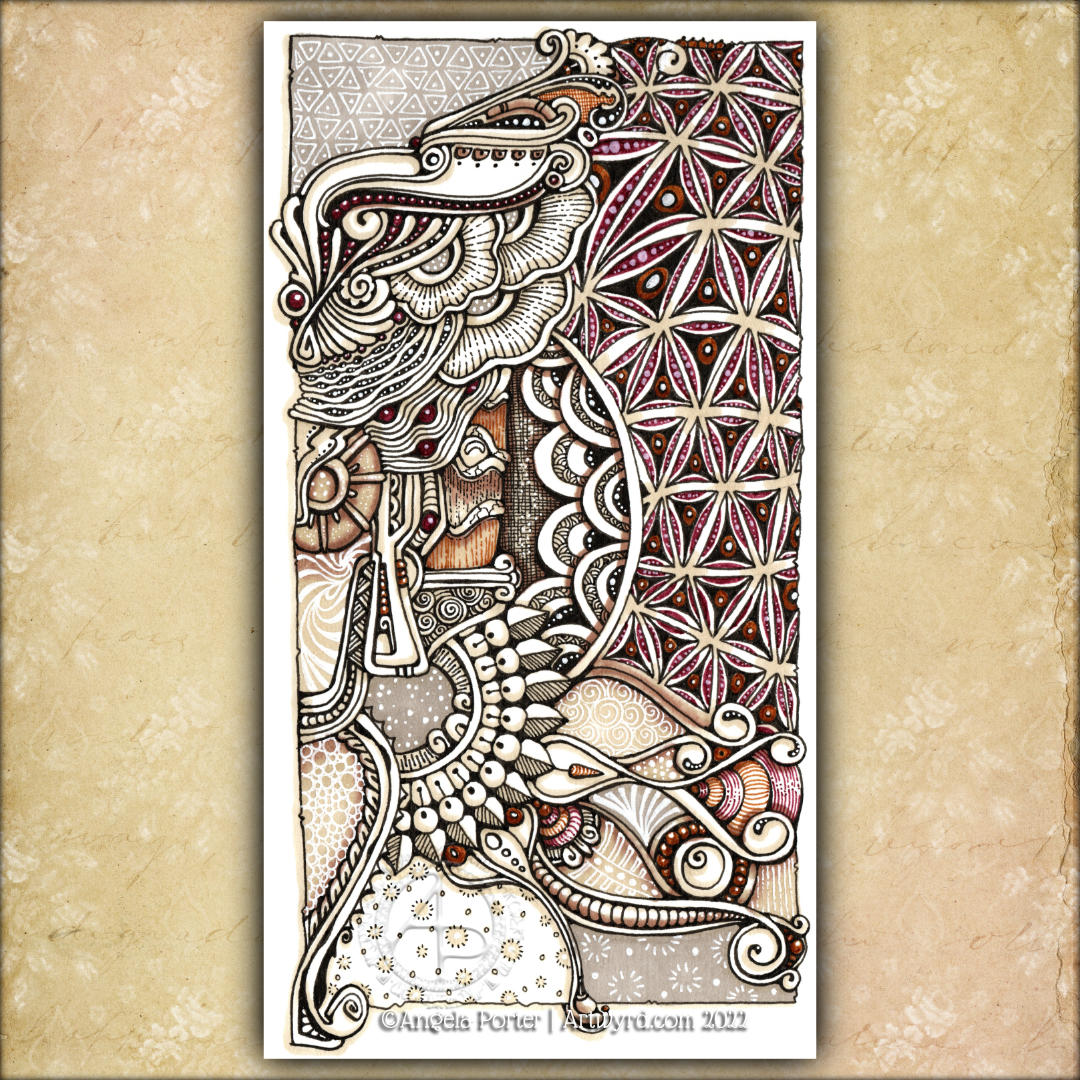
For this morning’s video, I decided to use two of the small squares. I started by colouring one side with Distress Inks. Then I drew the designs with various black fineliner pens. Next, I added more colour with Inktense pencils and a water-brush. Finally, highlights were added with white gel pens and a gold gel pen on the Aquafleur design. Not sure the gold pen was a good idea; I might have been better off using a dip pen and gold ink. It’s all a learning process!

Then, it was time to hand-letter a message on the back and decorate. This is where I think things went a tad to pot. In hindsight, I wish I’d coloured the reverse of the tile too, as, the white looks so stark. But they’ll do. My hand-lettering isn’t the best, but again it will do. My biggest problem is not letting the ink dry fully before erasing pencil lines and/or adding Inktense pencils. But they’re not too shabby…possibly.

What I may try doing, as these are test pieces, is using some Microglaze to seal them. Not only will it seal the Distress Ink, but will give a glossy finish that will bring out the colours more. The problem with Micro glaze is that it smears the black pen lines. But as these are test pieces, if that happens, I’ll learn not to do it again in the future, or use different kinds of pens. I wonder how the Dokumentas in the Twisbi’s will react to Micro glaze? That is an experiment I need to try out!

My only problem once I’m happy with this, apart from learning how to take better photographs of my work, is finding the courage to leave these things. The intense embarrassment and shame I know I’ll feel will be great. That will come out of the old fear that no one will like what I do or appreciate it or understand that it comes from a place of unconditional love and gratitude for our connections. And this is the reason why I’m dithering about whether or not to include my email.

I’ll work it out. I usually do, eventually! Until then, I have a small pile of tiles to decorate, Micro glaze and different pens to experiment with, and how to put messages on the back… part of me thinks printing them out and glueing them on could be a way to go. I have actually turned one of my hand-lettering styles into a font! Something else for me to think about.

Exploring Triangular Zentangle Fragments

Click on this link to watch the accompanying YouTube drawing tutorial.

This morning I just wanted to mess around with some fragments, and triangular ones seemed the way to go! ‘Fragments’ is the Zentangle term for the cells that make up a repeating pattern.

I started with a simple fragment of a circle (orb in Zentangle-speak) inside a triangle. All of these fragments have orbs as part of them, and I’m not sure if I’ve done many of them before.

I’ve written it before, and no doubt will again, that exploring both fragments and tangle patterns is an absorbing activity. No matter how often I look at one particular fragment, there are endless variations that can result. Some may be of use in a ‘reticulum’ (Zentangle-ese for the grid upon which a pattern is formed), others may just be for the experience of being curious and seeing what happens if I do x, y or z…

This is also a great warm-up activity. It gets my hand-eye coordination and fine motor control working well. My creative brain gets flexed and exercised too. It is also an opportunity to try out new drawing tools and media.

Another big benefit of this practice is that there is no pressure to complete a finished artwork. There’s the implied permission to make mistakes, for things to not work out. Indeed, I learn more from those that don’t work out or where a mistake is made than anything that works out well.

I’m always amazed by how many fragments can be made from a simple start. In this case a circle within a triangle.

My A3 Drawing Board, side 1.

Over the past two or three weeks, I’ve been gradually decorating my A3 drawing board. The board is made from compressed wood chips and has a dull, pale brown colour. That means I chose colours that would work well on this brown.

I drew the black lines with a Tombow Fudenosuke brush pen, which is now almost empty of ink! The brush tip is a tad worn but functioning well all the same.

I added colour with Arteza EverBlend marker pens. The white highlights were added with a white Posca pen.

There are only two things left for me to do. Firstly, use a spray varnish on this side to protect the drawing. The second is to decorate the other side too!

It has taken me many hours of work, some of them when I wake in the middle of the night with my mind whirring. Eventually, my mind calms down, and I can get back to sleep. Lying in bed, tossing and turning, is useless to me. I much prefer to do some intuitive art like this. Something I don’t need to think about, just let it happen, and that in itself quietens my mind down.

A flowy, abstract pen drawing.

Click on this link to view the accompanying YouTube Draw With Me tutorial video.

I was asked to look at the absolutely beautiful work by Angel_Draws on Instagram, use the work as inspiration, and explain how to create similar texture and volume.

I chose to use an extra fine Twisbi Eco fountain pen. The paper is Moss toned paper by Fabriano, which measures approximately 12.5cm square (approx 5″). For the shade, I used a Prismacolour Ebony graphite pencil. A General’s white charcoal pencil was my choice for the highlights.

I’ve had a go and done it my way, that’s for sure. I enjoyed creating lines that give the illusion of volume in the drawing. Adding shade and light really brought the appearance of folded space out.

It’s also complex, intricate, convoluted, and maelstrom-like, reminding me of roiling, billowing clouds. The textures of clouds are fascinating to me at this time. I’ve seen some amazing ones recently.

I’m not sure if this drawing is finished or whether I’ll add more of the frilly stuff around it. Only time and a good night’s sleep, or several, will tell!

Exploring Stylised Flower Motifs

This morning I wanted to do something fairly simple, soothing and relaxing. So, I chose to look at some variations of a stylised flower motif.

The version I started with is in the centre bottom of the design.

I used various Distress Watercolour Pencils and a water brush to add colour.

The white and gold highlights and patterns were added using gold and white acrylic ink and a dip pen.

Finally, the more intense shade was added using a graphite pencil and a paper stump. I even put some graphite around the gold foliage surrounding the design.

Overall, I’m quite happy with this one. I like the mostly monochrome blue/teal colour scheme on the grey tile. I wasn’t sure bout the gold patterns, but now it’s finished, I think It’s turned out just fine.

Another Flowy Zentangle Inspired Pattern

In today’s video, I started drawing this design inspired by one by Doodlillusion on Instagram. I’d been asked to look at this one by a YouTube subscriber, so today I have.

I definitely used Doodlillusion’s art as inspiration, drawing it in my own way. I trust that I can show and explain how I approached this kind of pattern, along with some hints and tips and various ways of working with it.

I’m quite pleased with the end result. I like the graphic black and white. Something I need to consider more in my monogram and other explorations, maybe!

Rectangular Zentangle Fragment Explorations

Click on this link to view the accompanying video on YouTube.

This was a nice way to start my day! Exploring fragments and creating fragments is always a fascinating process. I never quite know what will come from my mind onto the paper. Some fragments work out, others don’t. Either way, it is still of value, even if just exercising hand-eye coordination, fine motor skills and the creativity ‘muscle’!

I can see some of these fragments working best as individual motifs. Others would work well in a reticulum – the zentangle name for a grid.

I still have quite a few rectangles to fill, so I will post them as a resource when that’s done.

Talking of resources… I now have quite a few sketchbooks and loose pages filled with explorations of fragments. I need to start organising them all so I can refer to them for inspiration. Or do I? I mean, it’s not a huge issue to just sit and do some of these fragments until I find one I’d like to use in a drawing. I worry about forgetting things, not using them or referring to them. Perhaps the value in all of this is to get a memory hoard of shapes and ways of putting patterns together, which can be drawn upon when needed.

Yes, a memory hoard, whether conscious or stored in the subconscious, is so important and trusting that all these things will be there, somewhere, ready to be used in different, unusual and even unique ways.

Entangled Drawing, 30 Aug ’22

I started this drawing in the wee small hours of the night when some night sweats woke me up. I’ve continued to work on it throughout the day as other things allowed me to.

I’m actually quite happy with this now it’s done. Along the way, I had some wobbly moments where I almost gave up. But I’m really glad I didn’t.

A friend thought it was rather ‘heraldic’ and expected to see a big letter in it! My next one will have a monogram as part of the design. It has a rather medieval feel and is typically Entangled with some Zentangle inspiration.

The drawing is approx 3.75″ x 7.5″ (10cm x 19cm) in size and was worked with a variety of fine liners, Arteza EverBlend markers and a white Gellyroll pen on All-Media paper by Seawhite of Brighton.

#DrawWithMe – The start of a flowy, Zentangle patterned colouring page

Click on this link to watch the accompanying video tutorial on YouTube

I enjoyed losing myself in the intricate, flowing, Zentangle-inspired drawing done yesterday; I thought I’d use the idea as the basis of a colouring page.

Not quite so intricate, and everything drawn on a larger scale to make it suitable for colouring, it was still very much a lovely thing to do.

The page is now finished and ready for its release to the Angela Porter’s Coloring Book Fans Facebook group tomorrow.

Draw With Me | A sketchbook page of oyster shells – Part 3

Click on this link to view the video tutorial for drawing the fourth oyster shell on YouTube

I’m about halfway through filling this slightly smaller than A5 sketchbook page with different kinds of oyster shells. Today’s even has a pearl in it!

I’m using the same peachy-pink and warm grey alcohol markers, but with the addition of a pale dusky kind of mauve colour for the shadow inside the shell.

I never claim to be an expert at colouring. However, using a very limited colour palette works in my favour, that’s for sure! The end result is good enough, which is what I always aim toward these days. Perfection is something that is unattainable. So good enough is just great!

I’ve been wintering on, both in speech and typing, about the purpose of my YouTube channel. Synchronicity struck today as two quotes about art appeared on my Facebook newsfeed today:

“Go into the arts. I’m not kidding. The arts are not a way to make a living. They are a very human way of making life more bearable. Practicing an art, no matter how well or badly, is a way to make your soul grow, for heaven’s sake. Sing in the shower. Dance to the radio. Tell stories. Write a poem to a friend, even a lousy poem. Do it as well as you possibly can. You will get an enormous reward. You will have created something.”

Kurt Vonnegut

“The one thing that you have that nobody else has is you. Your voice, your mind, your story, your vision. So, write and draw and build and play and dance and live only as you can.”

Neil Gaiman

These two quotes eloquently sum up what I think I want to bring to YouTube, my social media, and to you.

Confidence to create art just for the pleasure of it and in your own way too.

Building self-confidence is the first step, and sometimes that needs help, instruction, step by step methods, and suggestions for variations and making it your own.

We all can draw. We just have to unlearn that drawing isn’t always about photographic representations. It’s about self-expression, and each of us expresses ourselves differently. Maybe in a similar way to others, but uniquely our own.

To have a bit of confidence to do this, in a sketchbook, where no one else has to see until you’re ready to share in a supportive environment, is all that is needed. I wasn’t lucky enough to have a supportive environment for creating art until I was in my 40s. If I can provide a supportive environment here, around social media, on YouTube, and perhaps in a closed Facebook group or some such place, then I will.

It’s nice to find a purpose, don’t you think? I do, and I’m glad I’ve found that purpose for YouTube at the very least.