Journal – pages 4 to 7

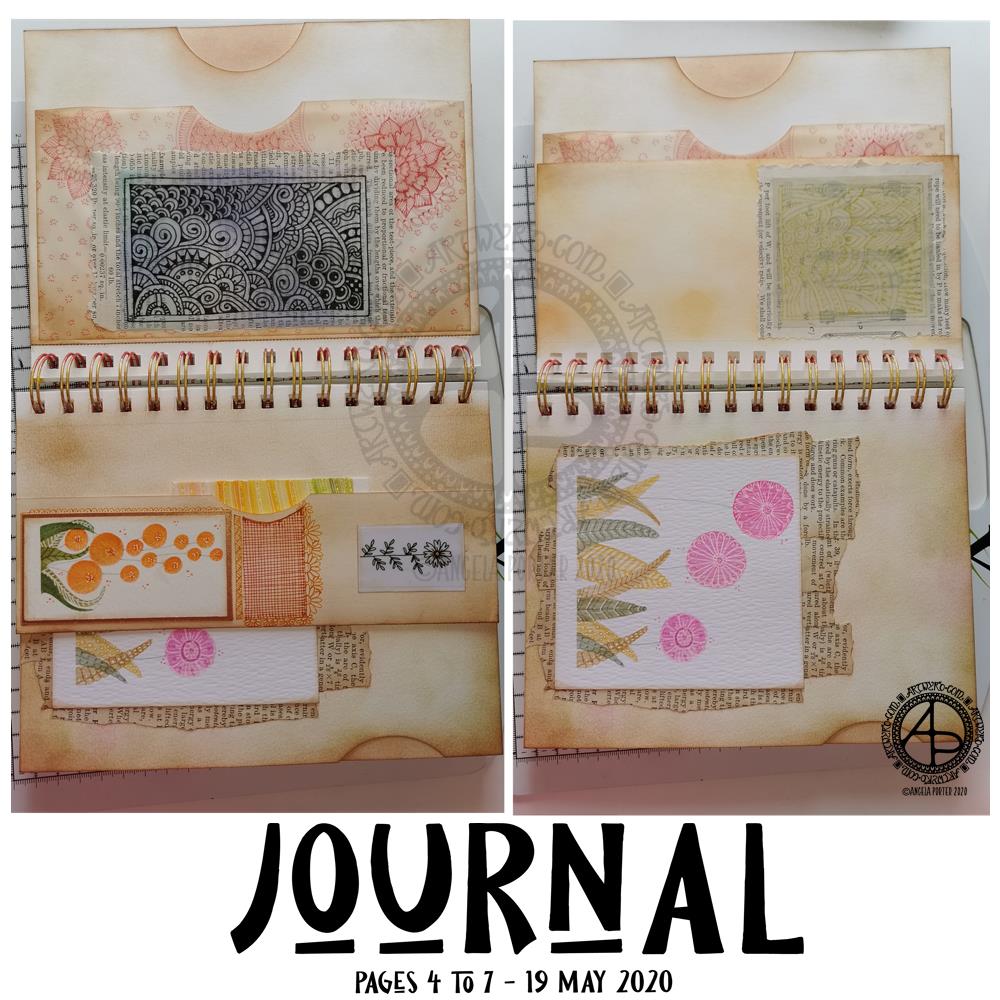
Over the past day or so, I’ve done some work on my journal and have pages 4 to 7 mostly complete. I’ve included lots of pockets to slip paper or artwork or other surprises into. I’ve also used some artwork I created as ephemera and embellishments.

Page 4 – top left.

This page has three pockets. One made by adhering two pages together, with a thumb notch punched out. Another is made from a sheet of tracing paper. The third is behind one of my signature entangled drawings; it’s a fairly secret pocket, unless I add something that peeks out from it.

I coloured the reverse of the drawing with Distress Inks as I didn’t know how they’d react with the pen drawing. Then, I adhered the tracing paper to some old book paper, and then adhered this to the tracing paper pocket, applying glue along three sides to create the pocket.

Once the glue was dry, I added some zentangle style patterns to the tissue paper pocket, just for fun. I used one of the Chameleon Fineliner pens to do this, using a colour that went well with the colours I’d used to ink the paper.

Page 5 – bottom left.

Page 5 is a little bit bigger than half the width of a page. I folded up the bottom of the page and adhered it along the edges to make a tuck-in. I punched out the thumb notch with a circle paper punch.

I decorated the tuck in with flower art at that I created myself. I also added some zentangle style patterns in between the flowers. I used Chameleon Fineliner pens, this time using a red and orange to get a gradient.

Page 6 – top right.

Again, a page that is a little more than half the width.

The drawing was done in gold ink on tracing paper. I used Distress Oxide inks to colour the reverse of the tracing paper before adhering it to some old book paper. The text and diagrams on the book page shows through faintly, as it does with the drawing on page 5.

Page 7 – bottom right.

This page just has a flower painting I created along with old book paper that have been collaged onto the journal page.

You can see the thumb notch on the edge of the page, showing I created a pocket by adhering two pages in the journal together.

Next steps…

None of the pages are fully completed. I’d like to add quotes or meaningful words or phrases. Some pages have gaps where I can add ephemera or pockets and so on. There’s certainly many spaces on the pages where I can draw patterns and designs.

I’m going to let the pages rest for a while as I turn my attention to other things today.

I’ve been feeling a bit ‘off’ or ‘meh’ in the last couple or so days. I’m finding it hard to settle to work of any kind. That I’ve been able to focus on getting some little bits and bobs done for the journal shows I’m feeling a bit more focused than of late.

Mixed media index cards

AngelaPorter_1June2017_MixedMediaIndexCard3

I started these 5″x 6″ cards yesterday and finished them (I think) this morning.

The focal images I drew myself on watercolour card.  I used Caran D’Ache Supracolour watercolour pencils and a damp brush to colour them.  I was quite happy with the colouring; I do find pencils a lot easier to use than traditional watercolours.

Nex, I cut three of them out around their edges and used a black marker to colour the white edges (and disguise my poor cutting out skills).  I had to use a craft knife in a couple of places.  The other two I cut out as small panels.

The drawings are a little bare of detail, mabye, but I can go back and add detail once I’ve decided what I’d like to do.

I’m not all that happy about the torn paper behind the focal images; you try things out and learn, maybe.  The torn paper is Gelli printed tracing paper made using PaperArtsy Fresco paints.  I then ran them through my Sizzix Big Shot in various embossing folders, and on some the embossed images have had some metallic waxes gently brushed over them. I also added some Inktense to the papers to darken the edges and add shadows.

What I am really happy with are the index cards themselves.

I started by covering them with gesso.  Then, I used some foliage stamps from IndigoBlu with grey Archival Ink by Ranger to add patterns.  I really liked this, as the patterns were softer and already ‘ghostly’ in the background, a much better choice than black Archival.

My next step was to add colour using ink blending sponges and Distress Oxide inks, followed by a spray of Gold perfect pearls mixed with water.

This is where there was an unexpected effect – the wet Distress Oxides were repelled from the Archival ink.  I loved the result, as well as the way the colours mixed as they pooled around the stamped patterns.

Here’s a close up where you can see how the Archival Ink has repelled the Distress Oxide inks:

AngelaPorter_1June2017_MixedMediaIndexCard1

Then, I used Versamark Ink to stamp more foliage on some of the cards, and mini-mandala type patterns on others.  I then sprinked WOW Embossing powder (clear holographic) over the ink then melted it with a heat tool.  This added an extra layer of interest – a subtle layer as it can only be seen from certain angles.

I framed the cards using black Archival ink and a foam blending tool to give a distressed looking edge.

Then, it was just assembly of the focal points and so on, before sticking the index cards to some really thick card to get them nice and flat; the cards are so thin that they curl a lot when working on them, even with the layer of gesso to seal the card in.  Cosmic Shimmer’s Specialist Acrylic Glue worked beautifully for this.

I had intended to make more ACEO cards, but I drew the focal images a tad too big for that format, so thought I’d try out an index card instead.  I quite enjoyed working on the slightly larger scale.