In today’s video, I started drawing this design inspired by one by Doodlillusion on Instagram. I’d been asked to look at this one by a YouTube subscriber, so today I have.
I definitely used Doodlillusion’s art as inspiration, drawing it in my own way. I trust that I can show and explain how I approached this kind of pattern, along with some hints and tips and various ways of working with it.
I’m quite pleased with the end result. I like the graphic black and white. Something I need to consider more in my monogram and other explorations, maybe!
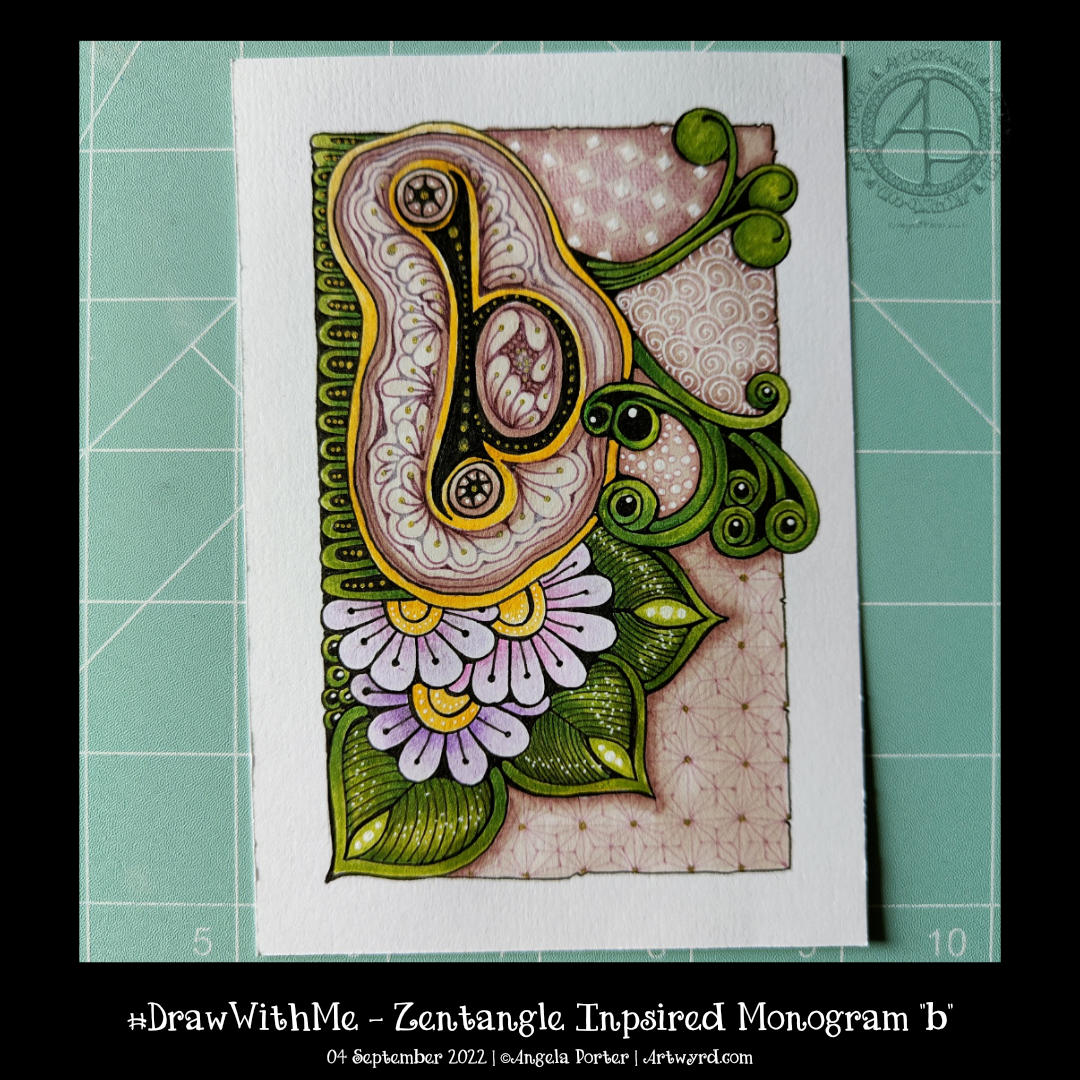
I’m continuing with my exploration of monograms and patterns. This one is a bit odd with the ba sitting above a pool or pebble..or something. But I quite like the patterns I’ve used to embellish it. I’m also rather fond of the background patterns, especially the very faint ones to the bottom right.
I’m not too fussed about the greens, yellows and the colours I used for the flowers. Pretty much every colour apart from the background colours and the colours of the patterns around the b!
Must write a HUGE reminder and stick it where I can see it “WORK IN MONOCHROME!”
All the same, it’s a learning exercise for me, as drawing always is. The ones that turn out not quite to my liking at the ones I learn most from. Having said that, I still haven’t learned that ‘work in monochrome’ thing yet! One day, maybe, I will.
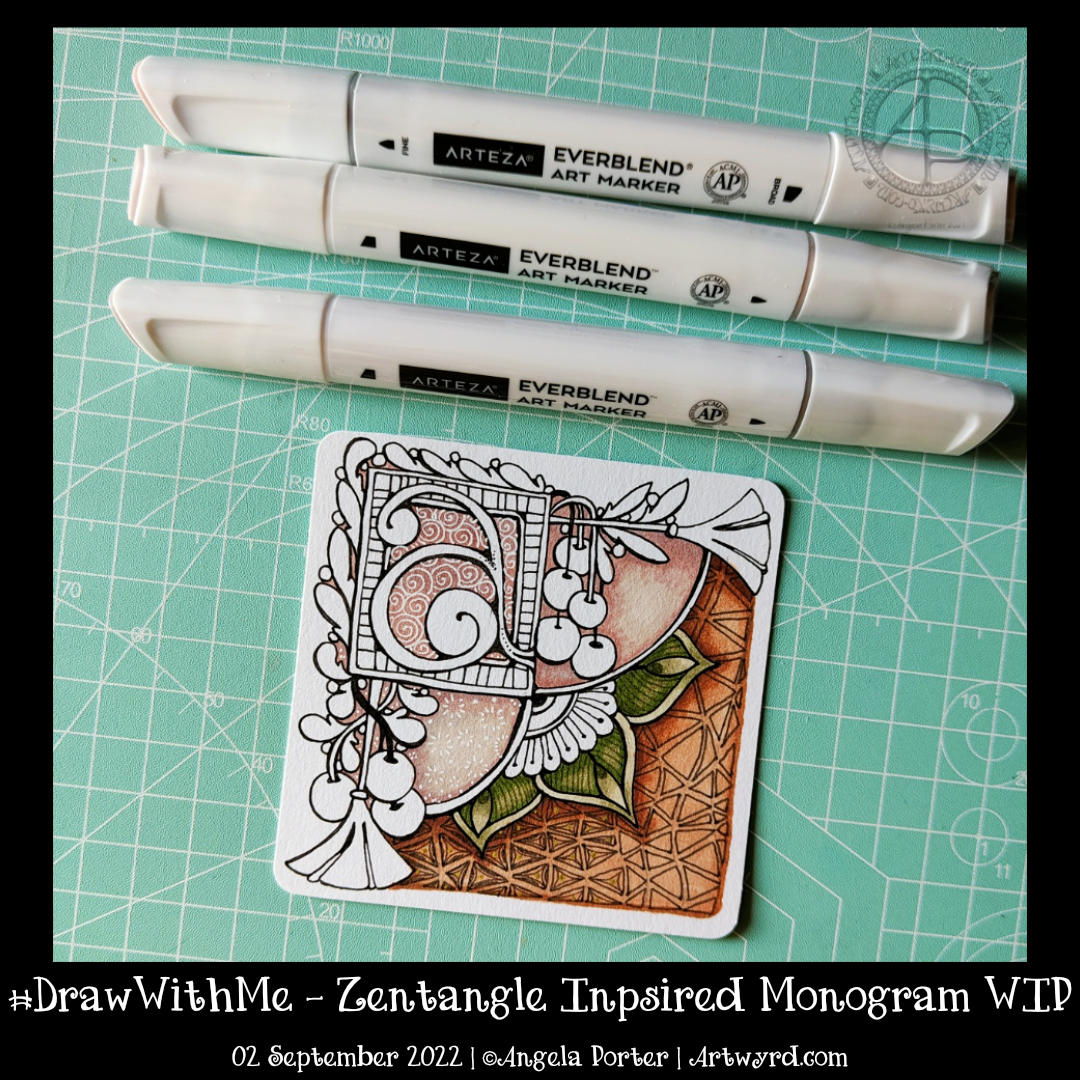
I’ve mostly finished this 3.5″ (11cm) square ’tile’ with a monogram. It’s changed a little since my last blog post this morning.
Apart from completing the colour, I coloured over the brown section in the bottom right. I used dark and light grey Gellyroll Moonlight pens to add the crazy ‘N’Zppel’ Zentangle pattern. It needs tidying up and perhaps some highlight within the inner black spaces.
But for now, it will do. I think I need a break from it to eat and do other things for a while.
This morning, I thought I’d share how I’m exploring creating some Entangled art, particularly monograms, via YouTube.
This little drawing is 11cm by 11cm, which is approximately 3.5″ square – took about an hour or so to get to this point. I wasn’t sure of the green, but I think it’ll work out just fine. There’s quite a way to go yet, but that will have to wait for another time.
The materials I used are: * 03 black Sakura Pigma Micron * Various Arteza Everblend marker pens * Various fineliners in grey and green * A white Sakura Gellyroll pen * A metallic gold Uniball Signo pen
This week’s colouring page for the members of Angela Porter’s Coloring Book Fans Facebook group is intricate. Still, it uses only three motifs – spirally furled leaves, starry flowers and stripey, plumptious seed pods.
I drew the design using a fine nib TWISBI eco fountain pen, filled with Documentus ink, on an A4 sheet of Artway’s Eco paper. To add colour, I used various Arteza Everblend markers. The pattern, textures, and highlights have been added with various Arteza Inkonic, Uniball Signo and Sakura Gellyroll pens.
This was a nice way to start my day! Exploring fragments and creating fragments is always a fascinating process. I never quite know what will come from my mind onto the paper. Some fragments work out, others don’t. Either way, it is still of value, even if just exercising hand-eye coordination, fine motor skills and the creativity ‘muscle’!
I can see some of these fragments working best as individual motifs. Others would work well in a reticulum – the zentangle name for a grid.
I still have quite a few rectangles to fill, so I will post them as a resource when that’s done.
Talking of resources… I now have quite a few sketchbooks and loose pages filled with explorations of fragments. I need to start organising them all so I can refer to them for inspiration. Or do I? I mean, it’s not a huge issue to just sit and do some of these fragments until I find one I’d like to use in a drawing. I worry about forgetting things, not using them or referring to them. Perhaps the value in all of this is to get a memory hoard of shapes and ways of putting patterns together, which can be drawn upon when needed.
Yes, a memory hoard, whether conscious or stored in the subconscious, is so important and trusting that all these things will be there, somewhere, ready to be used in different, unusual and even unique ways.
I started this drawing in the wee small hours of the night when some night sweats woke me up. I’ve continued to work on it throughout the day as other things allowed me to.
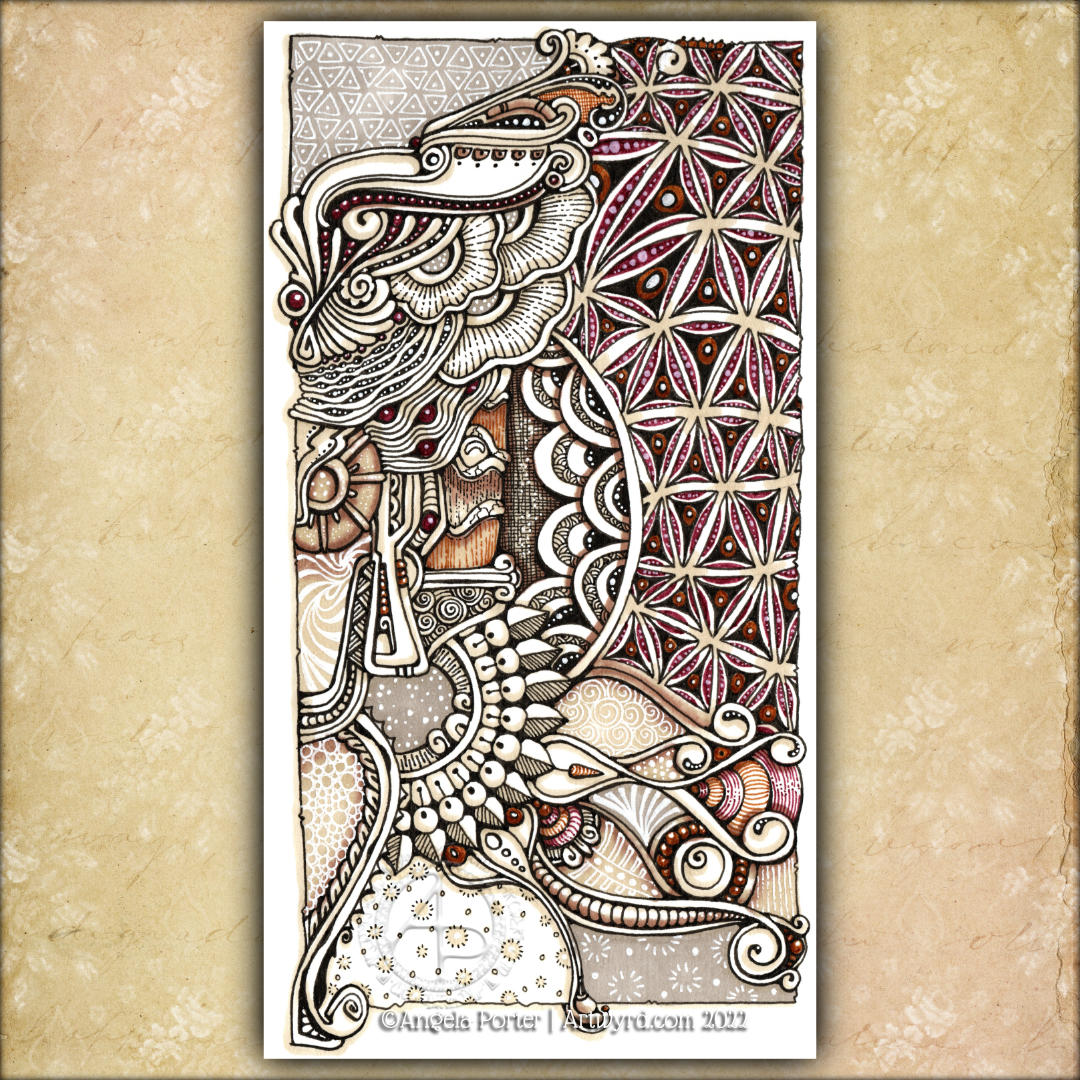
I’m actually quite happy with this now it’s done. Along the way, I had some wobbly moments where I almost gave up. But I’m really glad I didn’t.
A friend thought it was rather ‘heraldic’ and expected to see a big letter in it! My next one will have a monogram as part of the design. It has a rather medieval feel and is typically Entangled with some Zentangle inspiration.
The drawing is approx 3.75″ x 7.5″ (10cm x 19cm) in size and was worked with a variety of fine liners, Arteza EverBlend markers and a white Gellyroll pen on All-Media paper by Seawhite of Brighton.
Today, I experimented with various things during this video. The first was putting a coloured background behind the drawing on vellum paper/parchment paper. Then, I coloured the back of a drawing with alcohol markers to show the difference. Alcohol markers work fine and well, but brush markers like Tombows, with water-based colours, work better. Coloured pencils will also work, as will most mediums.
The next experiment involved drawing on some vellum with a metallic gel pen and then a black fineliner and embossing from the back. These work really well. You could draw with any kind of gel pen, fineliner or just a pencil, graphite or white or another colour.
I also showed how you can add highlights to the drawing even when the colour has been added to the reverse. The embossed vellum will always look white on the front if you emboss it on the rear.
The final thing I did was to complete the drawing of scena variations, which you can see above. This will need a good while to flatten out under some heavy items before I can finish adding filler patterns and either colour or coloured background.
I have thoroughly enjoyed exploring vellum/parchment to create Zentangle-inspired art using not pens but ball styluses. It’s the same yet different to drawing on paper with a pen. But, I think it is worth continuing to explore and use from time to time.
Like many of you, I have been watching Zentangle’s Project Pack 18 videos. For this project pack, they’ve included vellum tiles, which they’ve called Translu-zen-cy. It took me a while to remember that I had some things in my stash – vellum, ball styluses for working on vellum, and past experiences drawing on vellum in the Pergamano style!
So, I had a bit of a faff around with vellum on Saturday and Sunday. This morning, I decided to share this with a YouTube video.
Drawing on vellum is fairly easy, but it’s not without its tricksy elements. First, you need a surface to work on with a little bit of ‘give’ so that the ball tool, a ballpoint pen that has run out, a fine-pointed knitting needle, or similar can emboss the vellum. This embossing is done on what will be the reverse of the artwork; the marks appear much more opaque white on the front. The darker the surface, the better, as it’s easier to see the marks you’re making on the reverse side.
You don’t need to use a lot of pressure to emboss the vellum. In fact, a series of lighter strokes, giving the vellum a chance to rest and relax back to being flat, is better than using heavy strokes. This will minimise the curling of the vellum, but it will still need to be put under a heavy book for a couple of hours, or days, to flatten it out. So it’s not something that can be completed in one go.
You can always tell which is the front; the lines feel raised because they are! Also, they are a more opaque white. I always check that I’m embossing on the reverse side before wielding the ball stylus with any kind of intent.
To make the ball stylus run smoothly across the vellum, making it easier to have a light hand, you can rub the vellum with a tumble drier sheet and the ends of the ball tools. It also makes your vellum smell nice for a while. Not that the vellum has a smell anyway.
Once the drawing is finished, it can be coloured, again on the reverse, mounted on coloured paper or card, or a combination of these. Metallic highlights can be added to the front if desired.
It has been a nice exploration of this technique and the Zentangle tangle pattern ‘Scena’. I’ve not finished drawing the design; the vellum is currently resting under my cutting mat so it can flatten out. But I’m going to film the process. Then, I’ll look at ways of adding colour to vellum in a third video in the series. That’s if I share the process of drawing the rest of the design.
I’m no expert on Pergamano, but drawing with other tools and surfaces is fun.
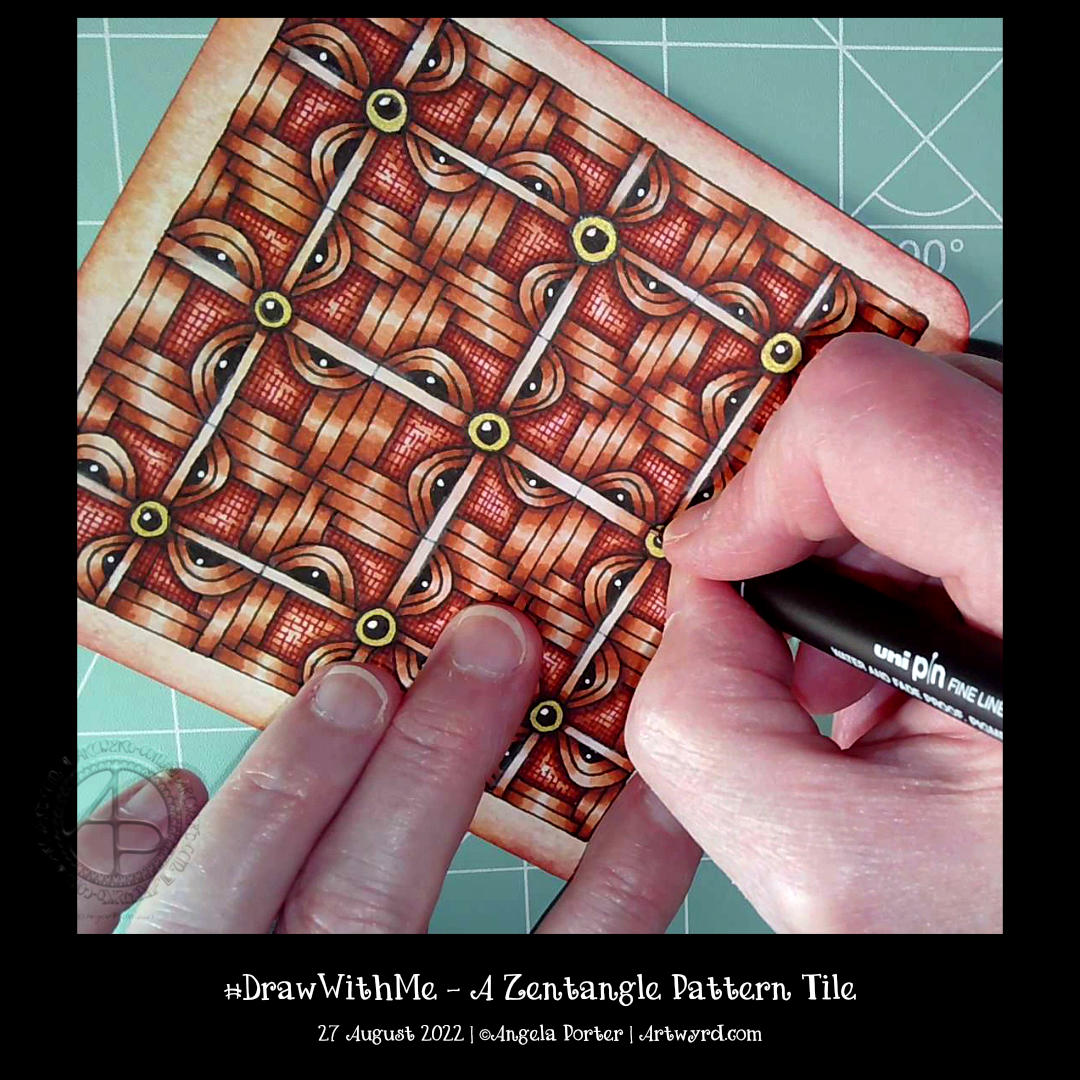
Today, I spent more than two hours creating this tile. I like how it’s turned out, particularly the volume and dimension achieved by shadow and highlight.
I started with a 4½” (11.5 cm) square of Artway’s Flat White Enviro mixed media paper, which is sturdy and works well with alcohol markers. My first step was to colour the paper with some Distress inks – I used Dried Marigold, Spiced Marmalade, Saltwater Taffy, Seedless Preserves and a hint of Aged Mahogany around the edge.
In true Zentangle fashion, no pencil was used to set the grid. And I chose to use a square fragment from my explorations yesterday. Of course, the fragment had a bit of a twist, with some weaving done in the style of the Zentangle pattern ‘Hurry’. Oh, and I used an 0.3 Unipin fineliner pen to do all the line drawing. Apart from the tattered burlap pattern, which I used a rusty red Staedtler Triplus fineliner for
The next step was to start to add shadow and highlight to warp space. Not really, but the illusion of dimension! I chose to use a trio of red-brown Ohuhu Art Markers. They don’t blend as well on this paper as they would on marker paper, but I like the texture that results in this case.
The final steps included: adding some shadow to the overlying grid with alcohol markers, highlights with a white charcoal pencil and a white 08 Gelly roll pen, and finally, the gold outer of the ‘buttons’ or ‘beads’ that hold the grid together.
I wanted to complete a piece of art for today’s video to mark a YouTube achievement of getting 1000+ subscribers. If you are one of those subscribers, I thank you from the bottom of my heart!