I enjoyed losing myself in the intricate, flowing, Zentangle-inspired drawing done yesterday; I thought I’d use the idea as the basis of a colouring page.
Not quite so intricate, and everything drawn on a larger scale to make it suitable for colouring, it was still very much a lovely thing to do.
Today, I am exhausted. I’ve had an incredibly busy three days, and as enjoyable as they all were, I managed to get over-stressed, over-anxious, over-wrought and exhausted. Oh, and an upset digestive system also always happens when I’m stressed.
All I need is a couple of stress-free and calm days to recover. Maybe more than a couple of days.
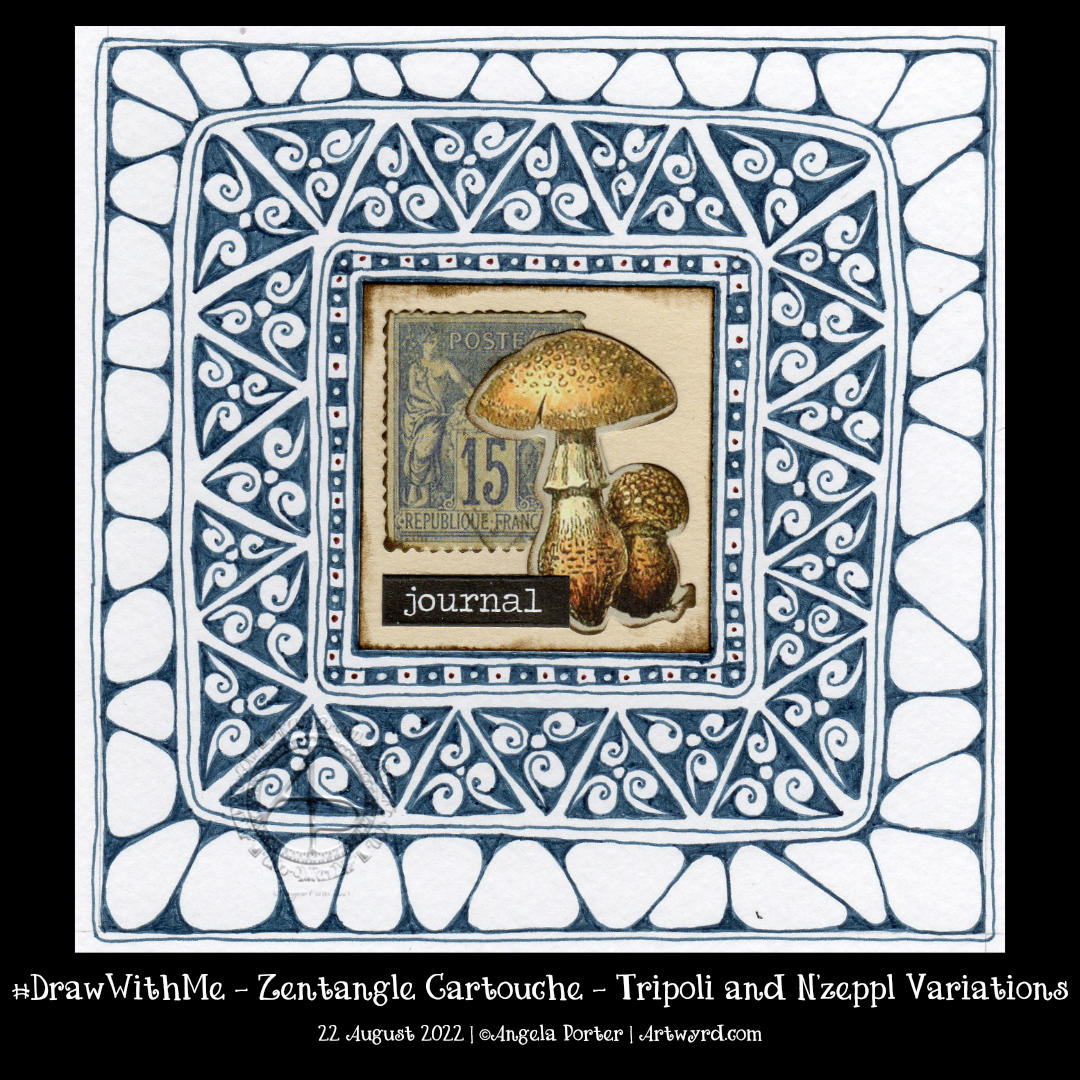
Earlier today, I wanted to draw, and I wanted to draw something that wouldn’t be too challenging – the focus being on calm and meditative. A Zentangle Cartouche seemed to fit the bill.
The central motif was a sticking point. Try as I might, it took me several attempts to get an assemblage of Tim Holtz Ephemera that was to my liking.
I knew I wanted to use a triangular fragment as part of the ‘cartouche’ to frame the focal point. I knew that black would most likely be too harsh. So, I went with a softer blue-grey. And that seemed to work out just fine. Apart from the fact I used a Zebra Sarasa 0.5 gel pen and the areas of dense ink are rather uneven. What is daft about this decision is that I have plenty of fine-liners that would do the job better!
Brain full of fluff and addlement today – told you so!
Anyhoo, I persevered and have got it to a point where I like the contrast between the ink-dense tripoli border and the more open N’zeppl. The next job is to decide how to add some contrast, colour, highlight or any combination of these! Oh, and what medium to use too, but that decision can wait until I’m less overwrought, brain-addled, and my head is less full of fluff to decide.
I have also managed to bake a cherry and coconut cake, which is remarkable, given I’m not too good at baking when I’m emotionally overwrought. It’s cooling down, so will try it later on for sure.
Although I didn’t tackle all of the triangular fragments in today’s video, I enjoyed sharing some explorations, along with the little bit of an overall pattern that came about almost accidentally!
I’d almost forgotten how much fun it is to use a basic shape and see how it can be turned into a fragment of a larger pattern. Then, create variations on this theme. Some of the fragments are from the Zentangle Primer Vol. 1, others are variations that resulted.
Please click on the “Watch on YouTube” button. Cheers!
I had a lovely time this morning adding colour to yesterday’s drawing.
To be precise, I chose to use Arteza’s EverBlend markers. I’m not at all sure about that green at the moment, but it may look quite different when I’ve finished colouring the drawing in.
In the video, I focus on explaining my method of adding colour and showing how I’ll add colour and contrast to each section of the design.
It’s blessedly cooler this morning as I write this blog. There’s been a little rain, but not enough to help out nature. We have the potential of thunderstorms and torrential rain at some point today. I do hope we get some thunderstorms – I love nature’s fireworks and drama! Rain is fine, but torrential rain can cause huge problems.
Anyhoo, to arty things. There are two drawings in the photo. I completed the one on the right on Sunday and filmed a video tutorial. It explores a new fragment shared on day one of Zentangle Project Pack 18. It’s always fun to explore patterns; I get to understand the pattern more and discover variations.
One of those variations came out in my sketchbook on Sunday evening. I used the ideas of the fragment as a way of filling space. What resulted looked a lot like the tangle pattern Diva Dance. you can see this in the drawing to the right in the image above.
It never ceases to amaze me how patterns can segue one into another as variations are explored. Everything, even tangle patterns, is interconnected and related by not that many degrees of variation!
Of course, I filmed the drawing of the flower and tangle pattern tile as a video tutorial. Hopefully, slowly and clearly enough that it’s easy to draw along with me. I hope you give it a go!
Wednesday is the week’s halfway point, and the day I start to draw this week’s colouring page for Angela Porter’s Coloring Book Fans Facebook group members.
I was awake early, the air was cool-ish, and starting to draw this week’s page and film it seemed a very sensible idea before the day warmed up.
Here in the UK, we have amber weather warnings for very high temperatures for the next few days. Not quite as high as a couple of weeks back, but too high for me to be comfortable. So, I aim to get as much done as possible before I have to either nap or retire to cooler parts of the house with sketchbook and pens! And probably fall asleep even then.
Anyways, my thoughts for this week’s colouring page were to create four smaller panels, each of which would make a lovely greetings card or postcard once coloured. I like pages that can be used in other ways, though I don’t create them often enough.
I had a very intensive, focused, and interesting time delving into the realms of digital art earlier today. When I’d finished, and had a late lunch/early dinner, I thought I’d do some drawing just for fun.
I had no idea what I was going to draw, not a single idea. I had a blank page in an A4 sketchbook, a couple of pens and of I went! And something whimsical and Doodleworlds-y appeared!
Please click the ‘Watch on YouTube” button, if you’d be so kind. Cheers!
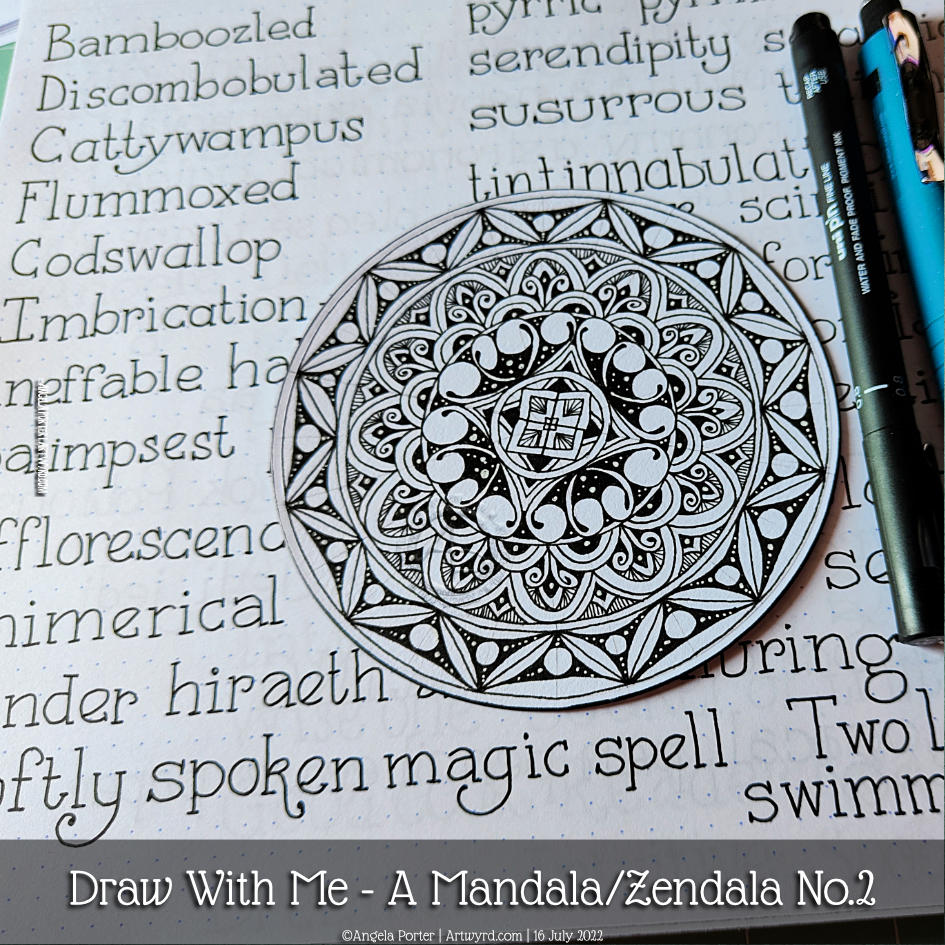
In this video, I draw a mandala (or zendala) step by step so you can join in with me.
I enjoyed creating yesterday’s mandalaso much, that I thought I’d repeat the experience! I finished drawing the mandala in this video, but I’ve yet to add shadow, highlight and/or colour. I’m not quite sure how I’m going to do that, yet; but there’s no rush to get it done either.
And here’s a photo of the mandala as it is at the moment, with some of my handlettering practice in the background!
In today’s YouTube video, I show how, step by step, I draw a mandala, or zendala, with traditional media. And the help of the Markus Operandus for Mandalas from Zentangle.com! A nifty printable that helps set out a mandala!
I’ve used two tangle patterns in this design – tripoli and between. I’ve taken inspiration from each to complete the outer ring.
To start with, I pre-cut a piece of ClaireFontaine Paint On mixed-media paper using an 11cm circle die, and a Sizzix Big Shot die cutting machine. In fact, I cut four at 11cm and four at 9cm in size, so I have a few that are good to go.
Next, I coloured one large and one small circle with Distress Inks. Then, I set about using the Markus Operandus to lay out the basic bones of the mandala.
Only then could I start to draw the design, though I had no idea what I was going to do.
The photo above is the final mandala. I used Arteza Everblend markers to add shadows to the zendala. A white gel pen was used to add dots of white for highlights. A silver Gelly Roll pen was used to add silver to the fine ring borders, to the circles and to the darker areas in the tripoli pattern pieces.
I’m quite happy with the outcome. More so, as it’s been a very long time since I drew a mandala without using digital tools.
Today’s video is rather long – well over an hour. It’s kind of a celebration that I’ve reached 900 subscribers on my YouTube channel! I never thought I’d get even one subscriber. So, a huge thank you to you if you’re one of my subscribers.